

Today we are pleased to introduce the 2019 update for Incredible PBX® and the Raspberry Pi® 2 and 3 featuring 70+ new FreePBX® GPL modules and a native Skyetel SIP trunking platform with a $10 service credit and up to $500 of half-price service. In addition to dozens of under-the-covers tweaks, there also are new backup and restore utilities which should ease the pain of backups and future migrations. In fact, today’s build was created using those tools because the image now is perilously close to filling up a 4GB microSD card. Crossing that threshold would mean future images would literally double in size. As always, for diehard users of legacy features, we’ve retained the terrific features we all know and love.
07/01/2019 NEWS FLASH: Please note that this version is not compatible with the Raspberry Pi 4. However, we have just released Incredible PBX LITE for the Raspberry Pi 2, 3, and 4 featuring Raspbian 10 Buster. Tutorial here.
08/07/2019 UPDATE: And, for the pioneers, Incredible PBX 16-15 for the Raspberry Pi 2, 3, and 4 is now available as well.
In addition to becoming a Nerd Vittles Platinum Provider, we have chosen Skyetel as our recommended SIP provider for several reasons that will be important to you. First, their triple-redundant platform has no equal. Not only have they never had an outage affecting customers, but they also are unlikely to ever have such an outage because their servers are scattered across the entire country (and soon the entire world). Let’s put it this way. If Skyetel’s servers all fail, you’ll have a lot more to worry about than restoring your VoIP service. A second reason we chose the Skyetel platform was introduced by us just last week. You now can bring up a fault-tolerant HA server platform using the Skyetel backbone and a cloud-based redundant server for about $1 a month. For Nerd Vittles readers, you can snag up to a $250 usage credit with Skyetel’s new BOGO deposit match. Read our Skyetel article and sign up soon to claim your BOGO service credit. Effective 10/1/2023, $25/month minimum spend required.
Raspberry Pi 3 Performance. Gone are the days of worrying about Raspberry Pi performance. Both the user interface and call quality now match what you’d expect to find on a $300-$500 VoIP server. Even with a Raspberry Pi 2, we have detected no performance degradation thanks to the latest Raspbian 8 OS and a virtually flawless Asterisk 13 platform. For best results, we recommend 32GB Class 10 microSD cards which now are plentiful for under $10.1
Incredible PBX Feature Set. Where to begin? Let’s start with the Alphabet Stew: IAX, SIP, SMS, Opus, and SRTP functionality. Voice Recognition and Text-to-Speech VoIP application support using FLITE, GoogleTTS, PicoTTS, and IBM TTS. SIP URI support for free worldwide calling. And all of your Nerd Vittles favorites: Fax, AsteriDex, Click-to-Dial, News, Weather, Reminders, and Wakeup Calls. Plus hundreds of features that typically are found in commercial PBXs: Conferencing, IVRs and AutoAttendants, Email Delivery of Voicemail, Voicemail Blasting…
10-Layer Network Security Model. Most phone calls cost money. Unlike many of the other "free" VoIP solutions, our most important criteria for VoIP is rock-solid security. If your free server ends up costing you thousands of dollars in phone bills due to fraud, guess what? It wasn’t free at all. Once you plug into a network, there’s a bullseye painted on your checkbook.
No single network security system can protect you against zero-day vulnerabilities that no one has ever seen. Deploying multiple layers of security is not only smart, it’s essential with today’s Internet topology. It works much like the Bundle of Sticks from Aesop’s Fables. The more sticks there are in your bundle, the more difficult it is to break them apart. If a vulnerability suddenly appears in the Linux kernel, or in Asterisk, or in Apache, or in your favorite web GUI, you can continue to sleep well knowing that other layers of security have your back. No one else in the telecommunications industry has anything close. Ours is all open source GPL code so we would encourage everyone to get on board and do your part to make the Internet a safer place!
Do your homework, too. Comparison shop as if your phone bill matters! 😉 Here’s what the latest Incredible PBX release provides at a software cost of exactly zero:
- Preconfigured IPtables Linux Firewall
- Preconfigured Travelin’ Man 3 WhiteLists
- Randomized Port Knocker for Remote Access
- TM4 WhiteListing by Telephone (optional)
- Fail2Ban Log Monitoring for SSH, Apache, Asterisk
- Password Customization
- Automatic Update Utility for Security & Bug Fixes
- Asterisk Manager Lockdown to localhost
- Apache htaccess Security for Vulnerable Web Apps
- Security Alerts via RSS Feed in the Incredible PBX GUI
Assembling the Required Raspberry Pi Components
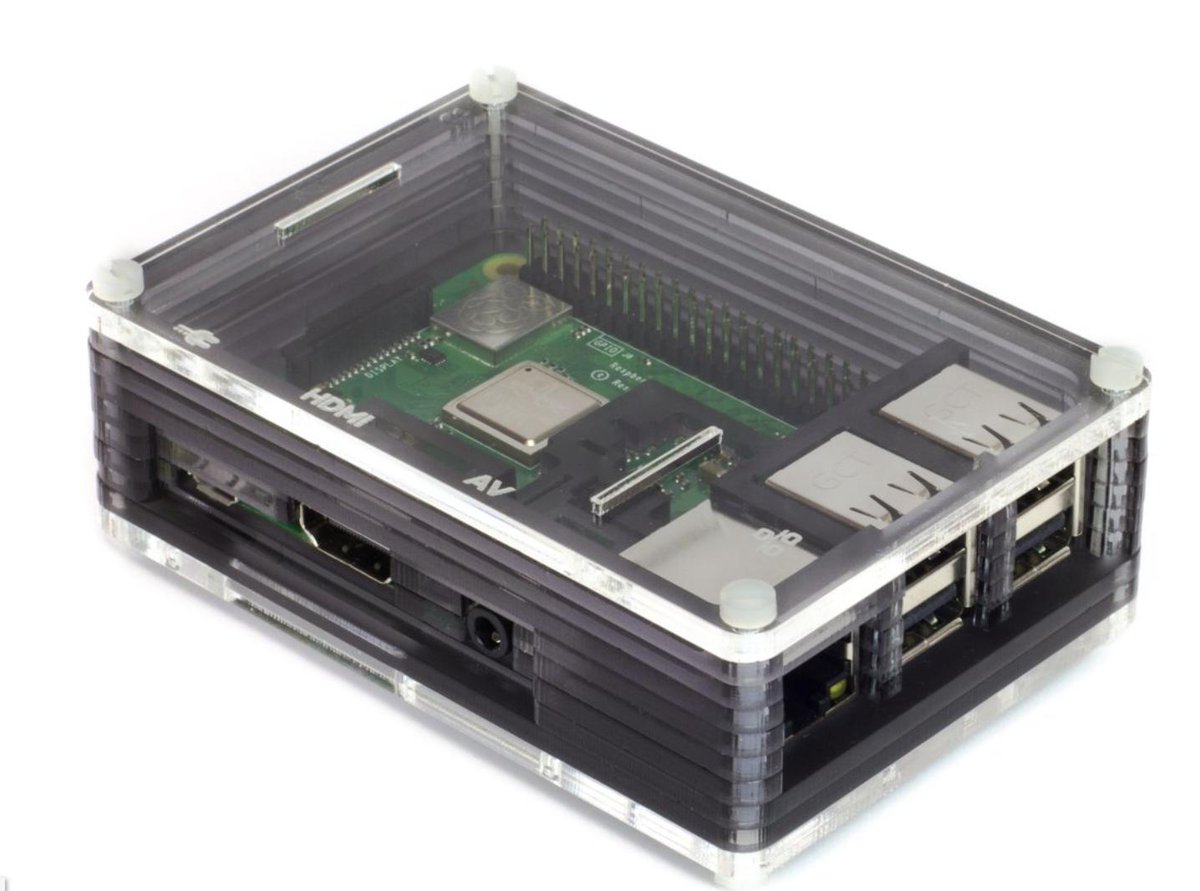
Before you can deploy Incredible PBX, you’ll first need the necessary Raspberry Pi hardware. Here’s the short list and, if you’re in a hurry, the $35 Raspberry Pi 3B+ will cost you 10% more to get it quickly from Amazon using our referral link. It remains one of the world’s best bargains! Assuming you already own an HDMI-compatible monitor and a USB keyboard…
$35* Raspberry Pi 3B+ from Newark or Amazon $10 Power Adapter (2.5 amps minimum!) $7 32GB microSDHC Class 10 card £12.95 Rainbow or Ninja Pibow case or $7.99 Official RasPi 3B+ case
Getting Started with Incredible PBX
Here’s everything to know about installation and setup. "Automatic" means just watch. Steps #1 and #2 are self-explanatory. For the remaining steps, we’ll further document the procedures in the sections below.
- Download and unzip Incredible PBX 13-13.10 image from SourceForge
- Transfer Incredible PBX image to microSD card
- Boot Raspberry Pi from new microSD card (16GB or larger)
- Login to RasPi console as root:password to initialize your server (Automatic)
- In raspi-config Advanced Options, Expand FileSystem to fill your SD card
- Reboot after writing down your server IP address (Automatic)
- Login via SSH or Putty as root:password to set passwords & setup firewall (Automatic)
- Register for and configure Skyetel for Incredible PBX, if desired
- Add Inbound Route for Skyetel, if desired
- Install Incredible Fax: /root/incrediblefax13_raspi3.sh (Credentials: admin:password)
First Boot of Incredible PBX Using Wi-Fi
Incredible PBX requires Internet connectivity to complete its automated install. If you’re using a wired network connection, you can skip to the next section. With the Raspberry Pi 3B+, WiFi is built into the hardware. But you still have to insert your SSID name and SSID password to make a connection to your WiFi network. To do so, follow these next steps carefully. Insert the Incredible PBX microSD card into your Raspberry Pi 3B+ and apply power to the hardware. When the bootup procedure finishes, login as root with the default password: password. At the first prompt, DO NOT PRESS THE ENTER KEY. Instead, press Ctrl-C to break out of the setup script. At the command prompt, issue the following commands to bring up the WiFi config file:
cd /etc/wpa_supplicant
nano -w wpa_supplicant.conf
If your WiFi network does not require a password, then insert the four line below and save the file: Ctrl-X, Y, then Enter. Now restart your server: reboot. When the reboot finishes, you now should have network connectivity.
network={
 key_mgmt=NONE
 priority=1
}
If your WiFi network requires a password, scroll down to the SSID entry and replace YourSSID with the actual SSID of your WiFi network. Make sure you preserve the entry with the quotes as shown. Next, replace YourSSIDpassword with the SSID password of your WiFi network. Save the file: Ctrl-X, Y, then Enter. Now restart your server: reboot. When the reboot finishes, you now should have network connectivity.
Once the reboot process finishes, you should see an entry on about the middle line displayed on your monitor which reads: "My IP address is…". Write down the IP address shown. You’ll need it in a minute. Skip the next section since you are using a WiFi connection.
If you don’t see an IP address assigned to your server, then correct the network deficiency (invalid WiFi credentials, DHCP not working, Internet down), and reboot until you see an IP address assigned to your server. DO NOT PROCEED WITHOUT AN ASSIGNED IP ADDRESS.
First Boot of Incredible PBX Using Wired Connection
Incredible PBX requires Internet connectivity to complete its automated install. After connecting your server to your local network with a network cable, insert the Incredible PBX microSD card into your Raspberry Pi 3B+ and apply power to the hardware. When the bootup procedure finishes, you should see an entry on about the middle line displayed on your monitor which reads: "My IP address is…". Write down the IP address shown. You’ll need it in the next step.
If you don’t see an IP address assigned to your server, then correct the network deficiency (cable not connected, DHCP not working, Internet down), and reboot until you see an IP address assigned to your server. DO NOT PROCEED WITHOUT AN ASSIGNED IP ADDRESS.
Completing the Incredible PBX Initialization Procedure
The remainder of the install procedure should be completed from a desktop PC using SSH or Putty. This will assure that your desktop PC is whitelisted in the Incredible PBX firewall. Using the console to complete the install is NOT recommended as your desktop PC will not be whitelisted in the firewall. This may result in your not being able to log in to your server. Once you have network connectivity, log in to your server as root from a desktop PC using the default password: password. Accept the license agreement by pressing ENTER. You then will be redirected to raspi-config. This is the utility used to expand your Incredible PBX image to use your entire microSD card. If you fail to complete this step, your microSD card will be restricted to 4GB which already is 95% full. In the raspi-config utility, choose item 7 (Advanced Options). All of the defaults should be satisfactory with the exception of the first item: Expand Filesystem. Choose this option and activate the resizing directive. Review the other items and then exit and reboot your server.
Once your server reboots and you log back in as root, you will be prompted to change all of your passwords. Write them down and put your cheat sheet in a safe place. It’s your only way back into your server without starting over.
Finally, if your PBX is sitting behind a NAT-based router, you’ll need to redirect incoming UDP 5060 traffic to the private IP address of your PBX. While this isn’t technically necessary to complete calls with registered trunk providers, there are others such as Skyetel that don’t use SIP registrations where failure to redirect UDP 5060 would cause inbound calls to fail.
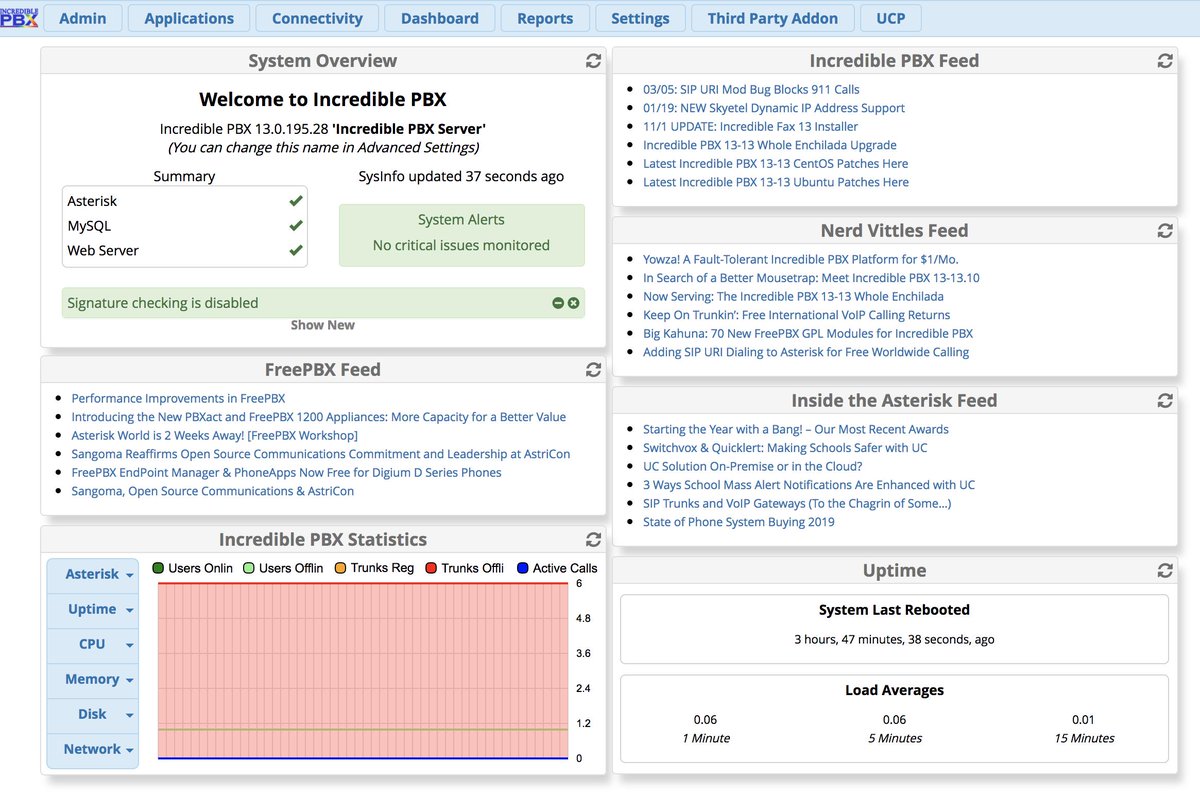
The First Login to the Incredible PBX GUI
The Incredible PBX GUI is accessed using a web browser pointed to the IP address of your server. As part of the password setup, you created an admin password for the Incredible PBX GUI, a.k.a. FreePBX GUI. Login now using your favorite browser. If you have forgotten your admin password, you can reset it by logging into your server as root using SSH: /root/admin-pw-change. Once you’ve logged into the GUI, your first task is to record the public and private IP addresses for your server. This eliminates 99% of the problems with one-way audio on calls where your server is sitting behind a NAT-based router. Navigate to Settings -> SIP Settings and click on Detect Network Settings in the NAT Settings section of the template. Verify that the entries shown are correct and then click Submit followed by Apply Config.
Managing a PBX with a Dynamic IP Address
Many Internet service providers assign dynamic IP addresses to customers. This poses issues with a PBX because SIP phones positioned outside your LAN need to be able to connect to the PBX. It also complicates SIP routing which needs both the public IP address and the private IP address of the PBX in order to route calls properly. In the previous section, you configured your PBX with these two IP addresses. The problem, of course, is that this public IP address may change when your ISP assigns dynamic IP addresses. Luckily, many ISPs rarely update dynamic IP addresses of their customers. For example, our home network has had the same dynamic IP address for more than four years. If this is your situation, then you have little to worry about. If the IP address ever changes, you can simply repeat the steps in the previous section. However, if your ISP regularly changes your public IP address, then you need an automatic way to keep your PBX configured properly. Otherwise you will start experiencing calls with one-way audio or no audio, and remote phones will no longer be able to connect to the PBX. We’ve developed a script to update the public IP address of your PBX. Depending upon your situation, all you need to do is run it hourly or daily to keep your PBX configured properly. To begin, first download the updater script after logging into your server as root:
cd /root
wget http://incrediblepbx.com/update-externip.tar.gz
tar zxvf update-externip.tar.gz
rm -f update-externip.tar.gz
Try running the script once to make sure it correctly identifies the public IP address of your server: /root/update-externip. Then add an entry to the end of /etc/crontab that schedules the script to run at 12:30 a.m. each night:
30 0 * * * root /root/update-externip > /dev/null 2>&1
Enabling OPUS Codec with Incredible PBX
@JoeOIVOV on the PIAF Forum has documented a method to activate the OPUS Codec on the Raspberry Pi. From the Linux CLI, issue the following commands while logged in as root:
cd /usr/lib/asterisk/modules
wget http://incrediblepbx.com/codec_opus_open_source.so
Then, use a browser to open the Incredible PBX GUI as admin and navigate to Settings -> Asterisk SIP Settings and scroll down to the Audio Codecs section of the template. Place a check mark beside the opus codec option. Then click Submit and Apply Settings.
Return to the Linux CLI and issue the following commands to complete the setup and verify:
fwconsole restart
asterisk -rx "core show codecs"
Special Thanks to: Walter Sonius on SourceForge
Configuring Trunks with Incredible PBX
Before you can actually make and receive calls, you’ll need to add one or more VoIP trunks with providers, create extensions for your phones, and add inbound and outbound routes that link your extensions to your trunks. Here’s how a PBX works. Phones connect to extensions. Extensions connect to outbound routes that direct calls to specific trunks, a.k.a. commercial providers that complete your outbound calls to any phone in the world. Coming the other way, incoming calls are directed to your phone number, otherwise known as a DID. DIDs are assigned by providers. Some require trunk registration using credentials handed out by these providers. Others including Skyetel use the IP address of your PBX to make connections. Incoming calls are routed to your DIDs which use inbound routes telling the PBX how to direct the calls internally. A call could go to an extension to ring a phone, or it could go to a group of extensions known as a ring group to ring a group of phones. It could also go to a conference that joins multiple people into a single call. Finally, it could be routed to an IVR or AutoAttendant providing a list of options from which callers could choose by pressing various keys on their phone.
We’ve done most of the prep work for you with Incredible PBX. We’ve set up an Extension to which you can connect a SIP phone or softphone. We’ve set up an Inbound Route that, by default, sends all incoming calls from registered trunks to a Demo IVR. And we’ve built dozens of trunks for some of the best providers in the business. Sign up with the ones you prefer, plug in your credentials, and you’re done. The next section of this tutorial will show you the easier way, using Skyetel.
Unlike traditional telephone service, you need not and probably should not put all your eggs in one basket when it comes to telephone providers. In order to connect to Plain Old Telephones, you still need at least one provider. But there is nothing wrong with having several. And a provider that handles an outbound call (termination) need not be the same one that handles an incoming call (origination) and provides your phone number (DID). Keep in mind that you only pay for the calls you make with each provider so you have little to lose by choosing several. The PIAF Forum also has dozens of recommendations on VoIP providers.
With the preconfigured trunks in Incredible PBX, all you need are your credentials for each provider and the domain name of their server. Log into Incredible PBX GUI Administration as admin using a browser. From the System Status menu, click Connectivity -> Trunks. Click on each provider you have chosen and fill in your credentials including the host entry. Be sure to uncheck the Disable Trunk checkbox! Fill in the appropriate information for the Register String. Save your settings by clicking Submit Changes. Then click the red Apply Config button.

Using Skyetel with Incredible PBX
On the Raspberry Pi platform, all of the Skyetel trunks are preconfigured. All you need to do is sign up for Skyetel service to take advantage of the $10 free credit and Nerd Vittles BOGO offer. First, complete the Prequalification Form here. You then will be provided a link to the Skyetel site to complete your registration. Once you have registered on the Skyetel site and your account has been activated, open a support ticket and request a $10 credit for your account by referencing the Nerd Vittles special offer. Greed will get you nowhere. Credit is limited to one per person/company/address/location. Once you’ve had a chance to kick the tires, fund your account with up to $250, and Skyetel will match your deposit. That gets you up to $500 of half-price VoIP service. Once you have funded your account, you can port in your phone numbers for 60 days at no cost. And you can also take advantage of a 10% discount on your current service. Just open another ticket and attach a copy of your last month’s bill. See footnote 2 for the fine print.2 If you have high call volume requirements, document these in your Prequalification Form, and we will be in touch.
Unlike many VoIP providers, Skyetel does not use SIP registrations to make connections to your PBX. Instead, Skyetel utilizes Endpoint Groups to identify which servers can communicate with the Skyetel service. An Endpoint Group consists of a Name, an IP address, a UDP or TCP port for the connection, and a numerical Priority for the group. For incoming calls destined to your PBX, DIDs are associated with an Endpoint Group to route the calls to your PBX. For outgoing calls from your PBX, a matching Endpoint Group is required to authorize outbound calls through the Skyetel network. Thus, the first step in configuring the Skyetel side for use with your PBX is to set up an Endpoint Group. A typical setup for use with Incredible PBX®, Asterisk®, or FreePBX® would look like the following:
- Name: MyPBX
- Priority: 1
- IP Address: PBX-Public-IP-Address
- Port: 5060
- Protocol: UDP
- Description: server1.incrediblepbx.com
To receive incoming PSTN calls, you’ll need at least one DID. On the Skyetel site, you acquire DIDs under the Phone Numbers tab. You have the option of Porting in Existing Numbers (free for the first 60 days after you sign up for service) or purchasing new ones under the Buy Phone Numbers menu option.
Once you have acquired one or more DIDs, navigate to the Local Numbers or Toll Free Numbers tab and specify the desired SIP Format and Endpoint Group for each DID. Add SMS/MMS and E911 support, if desired. Call Forwarding and Failover are also supported. That completes the VoIP setup on the Skyetel side. System Status is always available here.
Configuring a Skyetel Inbound Route
Because there is no SIP registration with Skyetel, incoming calls to Skyetel trunks will NOT be sent to the Default Inbound Route configured on your PBX because FreePBX treats the calls as blocked anonymous calls without an Inbound Route pointing to the 11-digit number of each Skyetel DID. From the GUI, choose Connectivity -> Inbound Routes. You will note that we already have configured a Skyetel template for you. Simply edit the existing entry and plug in the 11-digit phone number (beginning with a 1) of your Skyetel DID . Set the Destination for the incoming DID as desired and click Submit. It defaults to extension 701.
If your PBX is sitting behind a NAT-based router, you’ll need to redirect incoming UDP 5060 traffic to the private IP address of your PBX. Then place a test call to each of your DIDs after configuring the Inbound Routes.
If you have installed the Incredible Fax add-on, you can enable Fax Detection under the Fax tab. And, if you’d like CallerID Name lookups using CallerID Superfecta, you can enable it under the Other tab before saving your setup and reloading your dialplan.
Configuring a Skyetel Outbound Route
If Skyetel will be your primary provider, it is preconfigured by default on the Raspberry Pi platform so you can use both 10-digit and 11-digit dialing to process outbound calls through your Skyetel account. If you prefer another setup, choose Connectivity -> Outbound Routes.

There are a million ways to design outbound calling schemes on PBXs with multiple trunks. One of the simplest ways is to use no dial prefix for the primary trunk and then use dialing prefixes for the remaining trunks.
Another outbound calling scheme would be to assign specific DIDs to individual extensions on your PBX. Here you could use NXXNXXXXXX with the 1 Prepend as the Dial Pattern with every Outbound Route and change the Extension Number in the CallerID field of the Dial Pattern. With this setup, you’d need a separate Outbound Route for each group of extensions using a specific trunk on your PBX. Additional dial patterns can be added for each extension designated for a particular trunk. A lower priority Outbound Route then could be added without a CallerID entry to cover extensions that weren’t restricted or specified.
HINT: Keep in mind that Outbound Routes are processed by FreePBX in top-down order. The first route with a matching dial pattern is the trunk that is selected to place the outbound call. No other outbound routes are ever used even if the call fails or the trunk is unavailable. To avoid failed calls, consider adding additional trunks to the Trunk Sequence in every outbound route. In summary, if you have multiple routes with the exact same dial pattern, then the match nearest to the top of the Outbound Route list wins. You can rearrange the order of the outbound routes by dragging them into any sequence desired.
Audio Issues with Skyetel
If you experience one-way or no audio on some calls, make sure you have filled in the NAT Settings section in the GUI under Settings -> Asterisk SIP Settings -> General. In addition to adding your external and internal IP addresses there, be sure to add your external IP address in /etc/asterisk/sip_general_custom.conf like the following example and restart Asterisk:
externip=xxx.xxx.xxx.xxx
If you’re using PJSIP trunks or extensions on your PBX, implement this fix as well.
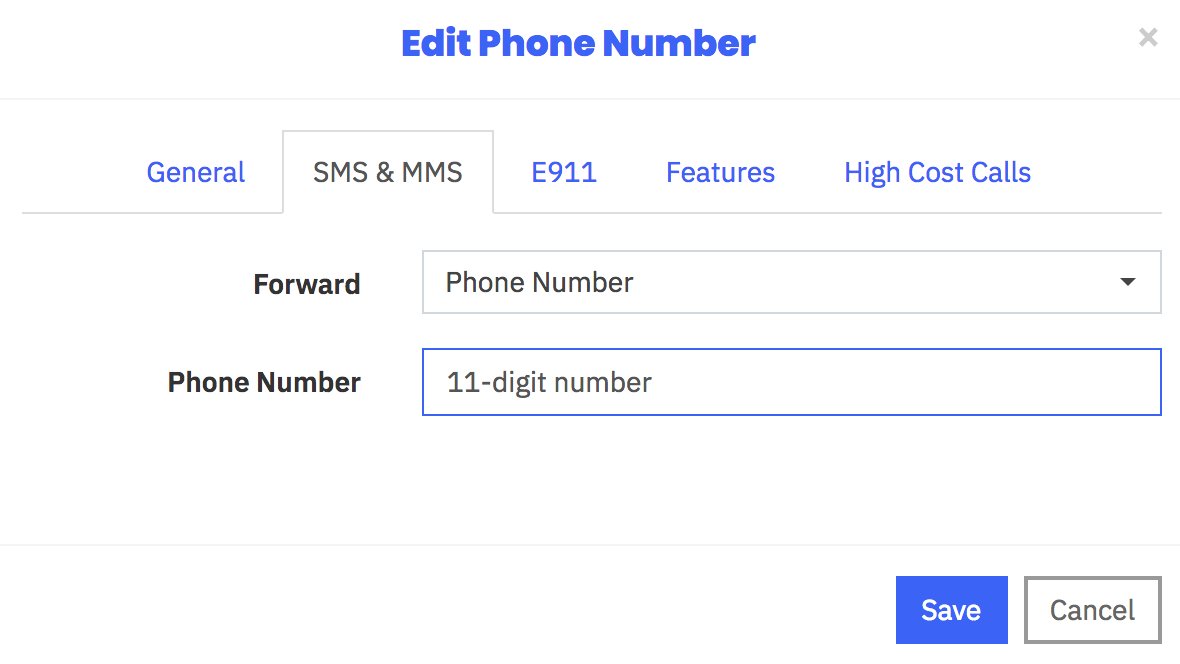
Receiving SMS Messages Through Skyetel
Most Skyetel DIDs support SMS messaging. Once you have purchased one or more DIDs, you can edit each number and, under the SMS & MMS tab, you can redirect incoming SMS messages to an email or SMS destination of your choice using the following example:
Sending SMS Messages Through Skyetel
We’ve created a simple script that will let you send SMS messages from the Linux CLI using your Skyetel DIDs. In order to send SMS messages, you first will need to create an SID key and password in the Skyetel portal. From the Settings icon, choose API Keys -> Create. Once the credentials appear, copy both your SID and Password. Then click SAVE.
Next, from the Linux CLI, issue the following commands to download the sms-skyetel script into your /root folder. Then edit the file and insert your SID, secret, and DID credentials in the fields at the top of the script. Save the file, and you’re all set.
cd /root
wget http://incrediblepbx.com/sms-skyetel
chmod +x sms-skyetel
nano -w sms-skyetel
To send an SMS message, use the following syntax where 18005551212 is the 11-digit SMS destination: sms-skyetel 18005551212 "Some message"
Configuring a Softphone for Incredible PBX
We’re in the home stretch now. You can connect virtually any kind of telephone to your new PBX. Plain Old Phones require an analog telephone adapter (ATA) which can be a separate board in your computer from a company such as Digium. Or it can be a standalone SIP device such as ObiHai’s OBi100 or OBi110 (if you have a phone line from Ma Bell to hook up as well). SIP phones can be connected directly so long as they have an IP address. These could be hardware devices or software devices such as the YateClient softphone. We’ll start with a free one today so you can begin making calls. You can find dozens of recommendations for hardware-based SIP phones both on Nerd Vittles and the PIAF Forum when you’re ready to get serious about VoIP telephony.
We recommend YateClient which is free. Download it from here. Run YateClient once you’ve installed it and enter the credentials for the 701 extension on Incredible PBX. You’ll need the IP address of your server plus your extension 701 password. Choose Applications _> Extensions -> 701 and write down your SIP/IAX Password. You can also find it in /root/passwords.FAQ. Fill in the blanks using the IP address of your Server, 701 for your Username, and whatever Password you assigned to the extension when you installed Incredible PBX. Click OK to save your entries.

Once you are registered to extension 701, close the Account window. Then click on YATE’s Telephony Tab and place some test calls to the numerous apps that are preconfigured on Incredible PBX. Dial a few of these to get started:
DEMO - Apps Demo

123 - Reminders

947 - Weather by ZIP Code

951 - Yahoo News

*61 - Time of Day

TODAY - Today in History
If you are a Mac user, another great no-frills softphone is Telephone. Just download and install it from the Mac App Store.
Upgrading to IBM Speech Engines
If you’ve endured Google’s Death by a Thousand Cuts with text-to-speech (TTS) and voice recognition (STT) over the years, then we don’t have to tell you what a welcome addition IBM’s new speech utilities are. We can’t say enough good things about the new IBM Watson TTS and STT offerings. With IBM’s services, you have a choice of free or commercial tiers. Let’s put the pieces in place so you’ll be ready to play with the Whole Enchilada.
Getting Started with IBM Watson TTS Service
We’ve created a separate tutorial to walk you through obtaining and configuring your IBM Watson credentials. Start there.
Next, login to your Incredible PBX server and issue these commands to update your Asterisk dialplan and edit ibmtts.php:
cd /var/lib/asterisk/agi-bin
./install-ibmtts-dialplan.sh
nano -w ibmtts.php
Insert your credentials in $IBM_username and $IBM_password. For new users, your $IBM_username will be apikey. Your $IBM_password will be the TTS APIkey you obtained from IBM. Next, verify that $IBM_url matches the entry provided when you registered with IBM. Then save the file: Ctrl-X, Y, then ENTER. Now reload the Asterisk dialplan: asterisk -rx "dialplan reload". Try things out by dialing 951 (news) or 947 (Weather) from an extension registered on your PBX.
Getting Started with IBM Watson STT Service
Now let’s get IBM’s Speech to Text service activated. Log back in to the IBM Cloud. Click on the Speech to Text app. Choose a Region to deploy in, choose your Organization from the pull-down menu, and select STT as your Space. Choose the Standard Pricing Plan. Then click Create. When Speech to Text Portal opens, click the Service Credentials tab. In the Actions column, click View Credentials and copy down your STT username and password.
Finally, login to your Incredible PBX server and issue these commands to edit getnumber.sh:
cd /var/lib/asterisk/agi-bin
nano -w getnumber.sh
Insert apikey as your API_USERNAME and your actual STT APIkey API_PASSWORD in the fields provided. Then save the file: Ctrl-X, Y, then ENTER. Update your Voice Dialer (411) to use the new IBM STT service:
sed -i '\\:// BEGIN Call by Name:,\\:// END Call by Name:d' /etc/asterisk/extensions_custom.conf
sed -i '/\\[from-internal-custom\]/r ibm-411.txt' /etc/asterisk/extensions_custom.conf
asterisk -rx "dialplan reload"
Now try out the Incredible PBX Voice Dialer with AsteriDex by dialing 411 and saying "Delta Airlines."
Transcribing Voicemails with IBM Watson STT Service
We’ve included the necessary script to transcribe your incoming voicemails using IBM’s STT service. Navigate to the /usr/local/sbin folder and edit sendmailmp3.ibm. Insert your APIKEY in the password field and save the file. Now copy the file to sendmailmp3 and make the file executable: chmod +x sendmailmp3.
Running Incredible PBX from an External USB Drive
CAUTION: If you wish to use an external USB-powered drive with your Raspberry Pi to get better performance and enhanced reliability, then you’ll want to stick with the Raspberry Pi B for the time being because the B+ does not yet support booting from an external drive that lacks an independent power source. See this thread for details.
With older versions of the Raspberry Pi, you may wish to consider an external USB drive to supplement your Incredible PBX for Raspberry Pi setup. If this is a production system on which you depend for important calls, we would highly recommend it. Begin by formatting the USB drive as a DOS FAT32 drive. Then install the Incredible PBX image on the USB drive using the same procedure outlined above for your microSD card. Be sure you choose the correct drive! Now boot your Raspberry Pi with the USB drive plugged in. Login as root and issue the command: mount /dev/sda2 /mnt. Using nano, edit /mnt/etc/fstab. Change /dev/mmcblk0p2 to /dev/sda2 and save the file. Edit /boot/cmdline.txt and change /dev/mmcblk0p2 to /dev/sda2. Then add the following to the end of the line: rootdelay=5. Save the file and reboot your server leaving the microSD card in place.
As configured, your server will now boot to the external USB drive, but the usable space on the drive will be the original 4GB partition. To expand it, do the following carefully. Log back into your server as root. Issue the command: fdisk -cu /dev/sda. List the partitions on your external drive by typing p. Write down the starting sector number for the sda2 partition. For example, on a 1 terabyte drive, it will be something like 131072. Now delete the sda2 partition by typing d and then choosing 2. Create a new primary partition by typing n then p then 2. When prompted for the starting sector, enter the number you wrote down for the sda2 partition above. Press ENTER. When prompted for the ending sector, just press ENTER to accept the default. Now type w to write your changes to the drive. Reboot. Log back into your server as root and issue the following command to expand the primary partition to use the entire disk: resize2fs /dev/sda2. Verify the new size of your drive: pbxstatus.
Using Gmail as a SmartHost for SendMail
Many Internet service providers block email transmissions from downstream servers (that’s you) to reduce spam. The simple solution is to use your Gmail account as a smarthost for SendMail. Here’s how. Log into your RasPi as root and issue the following commands:
cd /etc/mail
hostname -f > genericsdomain
touch genericstable
makemap -r hash genericstable.db < genericstable
mv sendmail.mc sendmail.mc.original
wget http://incrediblepbx.com/sendmail.mc.gmail
cp sendmail.mc.gmail sendmail.mc
mkdir -p auth
chmod 700 auth
cd auth
echo AuthInfo:smtp.gmail.com \\"U:smmsp\\" \\"I:user_id\\" \\"P:password\\" \\"M:PLAIN\\" > client-info
echo AuthInfo:smtp.gmail.com:587 \\"U:smmsp\\" \\"I:user_id\\" \\"P:password\\" \\"M:PLAIN\\" >> client-info
echo AuthInfo:smtp.gmail.com:465 \\"U:smmsp\\" \\"I:user_id\\" \\"P:password\\" \\"M:PLAIN\\" >> client-info
nano -w client-info
When the nano editor opens the client-info file, change the 3 user_id entries to your Gmail account name without @gmail.com and change the 3 password entries to your actual Gmail password. Save the file: Ctrl-X, Y, then ENTER.
Now issue the following commands. In the last step, press ENTER to accept all of the default prompts:
chmod 600 client-info
makemap -r hash client-info.db < client-info
cd ..
sed -i 's|sendmail-cf|sendmail\/cf|' /etc/mail/sendmail.mc
sed -i 's|sendmail-cf|sendmail\/cf|' /etc/mail/sendmail.mc
sed -i 's|sendmail-cf|sendmail\/cf|' /etc/mail/Makefile
sed -i 's|sendmail-cf|sendmail\/cf|' /etc/mail/sendmail.cf
sed -i 's|sendmail-cf|sendmail\/cf|' /etc/mail/databases
sed -i 's|sendmail-cf|sendmail\/cf|' /etc/mail/sendmail.mc.gmail
sed -i 's|sendmail-cf|sendmail\/cf|' /etc/mail/sendmail.cf.errors
make
sendmailconfig
Finally, stop and restart SendMail and then send yourself a test message. Be sure to check your spam folder!
/etc/init.d/sendmail stop
/etc/init.d/sendmail start
apt-get install mailutils -y
echo "test" | mail -s testmessage you@yourdomain.com
Check mail success with: tail /var/log/mail.log. If you have trouble getting a successful Gmail registration (especially if you have previously used this Google account from a different IP address), try this Google Voice Reset Procedure. It usually fixes connectivity problems. If it still doesn’t work, enable Less Secure Apps using this Google tool.
The last step is to add the following command to /etc/rc.local to send you an email with your PBX's IP addresses whenever the RasPi is rebooted. Insert the following one-line command just above the exit 0 line at the end of the file. Replace yourname@yourdomain.com with an email address to which you always have access.
echo LAN: $(ifconfig | grep "inet addr" | sed 's/^[[:space:]]*//' | sed 's/ .*$//g' | cut -f 2 -d " ") NET: $(curl -s -S --user-agent "Mozilla/4.0" http://myip.incrediblepbx.com | awk 'NR==2') | mail -s "Incredible PBX 13-13.10 RasPi IP Address" yourname@yourdomain.com
WebMin: Wherefore Art Thou?
Some of you may have noticed that WebMin is missing in this new release. For newcomers, WebMin is the Swiss Army Knife of Linux. You can do almost anything to Linux from the convenience of a browser. Unfortunately, in the PBX environment, WebMin is a two-edged sword. You can also permanently ruin your PBX in a matter of seconds if you don't know what you're doing because WebMin hides most of its magic under the covers so you really can't decipher what's been changed. Our best advice to those wanting to use WebMin is to use it as a tool to look (but don't touch) the Linux setup. The other major dilemma for us was that the current Incredible PBX build comes perilously close to filling a 4GB microSD card. And moving to an 8GB card to build a PBX would have doubled the size of the download image. Once you have installed Incredible PBX on a larger microSD card and expanded the filesystem to fill the new card, the commands below will get WebMin installed. Once installed, you can access WebMin with a browser pointed to https://ip-address:9001 using the same root credentials used to login with SSH.
echo "Installing WebMin..."
echo "deb http://download.webmin.com/download/repository sarge contrib" \\
> /etc/apt/sources.list.d/sarge.list
cd /root
wget http://www.webmin.com/jcameron-key.asc
apt-key add jcameron-key.asc
apt-get update
apt-get install webmin -y
sed -i 's|10000|9001|g' /etc/webmin/miniserv.conf
service webmin restart
Implementing Bluetooth Proximity Detection
You may find it convenient to have your calls transferred when you're away from your desk. The RasPi can do it automatically if you have a smartphone and a RasPi 3B+ with built-in bluetooth support.
1. Decipher the MAC address of your RasPi's Bluetooth adapter: hcitool dev
2. Turn on Bluetooth and enable discovery on your smartphone.
3. Search for your smartphone's MAC address from the RasPi CLI: hcitool scan
4. Install our Bluetooth Proximity Detection Utility on your RasPi:
cd /root
wget http://nerdvittles.com/trixbox123/proximity.zip
unzip proximity.zip
chmod +x proximity
5. Edit the proximity script and fill in the blanks using the extension you want to forward when you're not "at home" and the 10-digit number of the smartphone to forward the calls to:
deviceuser=YourName
devicemac=Mac:Address:Of:Your:Smartphone (with the colons from step #3)
myextension=701
mycellphone=8435551212
6. Add a cron job to /etc/crontab to check for the presence of your cellphone every minute between 6 am and 9 pm:
* 6-21 * * * root /root/proximity > /dev/null
When you're home, your cellphone obviously must be within range of your Raspberry Pi and you need a working outbound trunk for outbound 10-digit calls for this to work while away.
/root/proximity:

WARD.now IN - Update Required
Sat Mar  9 13:51:07 EST 2019
Database entry removed.
Installing OSS Endpoint Manager
If you have dozens of SIP phones to configure, then you'll appreciate Andrew Nagy's terrific OSS Endpoint Manager Module. Here's how to install it once your Incredible PBX 13-13.10 server is up and running:
cd /
wget http://incrediblepbx.com/epm.tar.gz
tar zxvf epm.tar.gz
./install-epm.sh
You will also need to install and configure a TFTP server. We've included a setup script to make it easy:
cd /root
./tftp-setup
Pay particular attention to the firewall instructions which display at the end of the TFTP install procedure. Complete documentation for OSS Endpoint Manager is available here. Helpful tips on implementation can be found in this PIAF Forum thread.
Configuring a SIP URI Address for Your PBX
Setting up a SIP URI is a simple way to let anyone with a SIP phone call you from anywhere in the world and talk for as long and as often as you like FOR FREE. The drawback of SIP URIs is typically the security risk accompanying the SIP exposure you must provide to receive these calls. Here's the safe way using what we call a hybrid SIP URI. It works like this. Sign up for a VoIP.ms account and create a subaccount that you will register using the VoIPms trunk included in Incredible PBX. As part of the setup in the VoIP.ms portal, assign an Internal Extension Number to your subaccount, e.g. 789123. Make it random so you don't get surprise calls from anonymous sources. The extension can be up to 10 digits long. Next, sign up for a free iNUM DID, e.g. 883510009901234, in your VoIP.ms account. Using Manage DIDs in the portal, link the iNUM DID to your subaccount and assign one of the VoIP.ms POP locations for incoming calls, e.g. atlanta.voip.ms. Next, write down your VoIP.ms account number, e.g. 12345. Once you've completed these three steps and registered the VoIP.ms subaccount on your PBX, you now have two SIP URIs that are protected by your VoIP.ms credentials and don't require you to expose your SIP port to the outside world at all. These SIP URIs can be pointed to different destinations by setting up Inbound Routes using your VoIP.ms account number as one DID and setting up your iNUM number as the second DID. To reach your PBX via SIP URI, callers can use 12345789123@atlanta.voip.ms to reach the DID you set up for your VoIP.ms subaccount where 12345 is your VoIP.ms account number and 789123 is the Internal Extension Number for your subaccount. Or callers can use 8835100099012234@inum.net to reach the DID you set up using your iNUM number that was assigned by VoIP.ms. Don't forget to whitelist the VoIP.ms POP's FQDN for SIP UDP access to your PBX:
/root/add-fqdn voipms atlanta.voip.ms
If you wish to make SIP URI calls yourself, the easiest way is to first set up a free LinPhone SIP Account. You can find dozens of recommendations for hardware-based SIP phones both on Nerd Vittles and the PIAF Forum. For today we'll get you started with one of our favorite (free) softphones, YateClient. It's available for almost all desktop platforms. Download YateClient from here. Run YateClient once you’ve installed it and enter the credentials for your LinPhone account. You’ll need LinPhone's FQDN (sip.linphone.org) plus your LinPhone account name and password. Fill in the Yate Client template and click OK to save your entries. Once the Yate softphone shows that it is registered, try a test call to one of our demo SIP URIs: sip:weather@demo.nerdvittles.com or sip:news@demo.nerdvittles.com.
Adding the NeoRouter Virtual Private Network
We've made it easy to set up a virtual private network between your PBX and your other computers. NeoRouter is a free VPN for up to 256 machines. It requires that you first set up a server for NeoRouter using a static IP address and preferably a fully-qualified domain name. This is covered in this Nerd Vittles tutorial. Once you have your NeoRouter server operational, adding your PBX to the VPN is easy. Simply run nrclientcmd and enter the FQDN of your VPN server together with your credentials. All clients on the VPN have an encrypted tunnel with private LAN addresses in the 10.0.0.x range. HINT: Setting up a NeoRouter VPN provides an easy way to get back into your server if the firewall ever locks you out since the 10.0.0.x subnet is automatically whitelisted as part of the initial install.
Using PortKnocker to Regain Access to Your PBX
And speaking of getting locked out of your server because you've forgotten to whitelist the IP address of your computer, there's another easy way to regain access: PortKnocker. The way the service works is you send sequential pings to 3 randomized TCP ports that are known only by you. They are listed in /etc/knock.FAQ. When your server detects a match, it will whitelist your new IP address allowing you to login using SSH or Putty. There also are PortKnocker utilities for both iOS and Android devices. Complete implementation details are available in this Nerd Vittles tutorial. If your PBX is sitting behind a router or firewall, don't forget to forward the three TCP ports from your router to the private LAN address of your PBX.

Planning Ahead for That Rainy Day
If you haven't already learned the hard way, let us save you from a future shock. Hardware fails. All of it. So spend an extra hour now so that you'll be prepared when (not if) disaster strikes. First, once you have your new PBX configured the way you plan to use it, make a backup of your PBX by running the Incredible Backup script: /root/incrediblebackup13
Copy down the name of the backup file that was created. You'll need it in a few minutes.
Second, build yourself a VirtualBox platform on your desktop PC. There's an Incredible PBX 13-13.10 Vbox image already available on SourceForge. Don't use the Vbox image for Raspbian. It has insufficient available disk space to support the new backups. Once you've downloaded the Vbox image, double-click on it to install. Then fire up the virtual machine, login as root with password as your password and install the latest Incredible Backup and Restore scripts
cd /root
rm incrediblebackup
rm incrediblerestore
wget http://incrediblepbx.com/incrediblebackup13.tar.gz
tar zxvf incrediblebackup13.tar.gz
rm -f incrediblebackup13.tar.gz
Next, create a /backup folder on your new VirtualBox PBX and copy the backup file from your main server to your VirtualBox server and restore it after logging in to VirtualBox PBX as root:
mkdir /backup
scp root@main-pbx-ip-address:/backup/backup-file-name.tar.gz /backup/.
/root/incrediblerestore13 /backup/backup-file-name.tar.gz
Verify that everything looks right by using a browser to access and review the settings in your new VirtualBox PBX. At a minimum, verify extensions, trunks, and routes.
The Million Dollar Question, of course, is whether you can put Humpty back together again by installing a fresh Incredible PBX 13-13.10 Raspbian image to a new microSD card, going through the basic initialization steps 1-7 on your Raspberry Pi, and then copying the backup image from the VirtualBox desktop machine back over to the new Raspbian PBX and restoring it. And the answer is A-B-S-O-L-U-T-E-L-Y. In fact, you can even make changes in the VirtualBox GUI, create a fresh backup, and then restore that image to your Raspberry Pi. Keep in mind our original caveat that, if you add components, packages, or applications to your primary server, those same additions need to be made to the secondary platform since they will not get picked up as part of the backup. Try it for yourself. And sleep well.
Originally published: Monday, March 11, 2019

Need help with Asterisk? Visit the VoIP-info Forum.
Special Thanks to Our Generous Sponsors
FULL DISCLOSURE: ClearlyIP, Skyetel, Vitelity, DigitalOcean, Vultr, VoIP.ms, 3CX, Sangoma, TelecomsXchange and VitalPBX have provided financial support to Nerd Vittles and our open source projects through advertising, referral revenue, and/or merchandise. As an Amazon Associate and Best Buy Affiliate, we also earn from qualifying purchases. We’ve chosen these providers not the other way around. Our decisions are based upon their corporate reputation and the quality of their offerings and pricing. Our recommendations regarding technology are reached without regard to financial compensation except in situations in which comparable products at comparable pricing are available from multiple sources. In this limited case, we support our sponsors because our sponsors support us.
 BOGO Bonaza: Enjoy state-of-the-art VoIP service with a $10 credit and half-price SIP service on up to $500 of Skyetel trunking with free number porting when you fund your Skyetel account. No limits on number of simultaneous calls. Quadruple data center redundancy. $25 monthly minimum spend required. Tutorial and sign up details are here.
![]() The lynchpin of Incredible PBX 2020 and beyond is ClearlyIP components which bring management of FreePBX modules and SIP phone integration to a level never before available with any other Asterisk distribution. And now you can configure and reconfigure your new Incredible PBX phones from the convenience of the Incredible PBX GUI.
The lynchpin of Incredible PBX 2020 and beyond is ClearlyIP components which bring management of FreePBX modules and SIP phone integration to a level never before available with any other Asterisk distribution. And now you can configure and reconfigure your new Incredible PBX phones from the convenience of the Incredible PBX GUI.
 VitalPBX is perhaps the fastest-growing PBX offering based upon Asterisk with an installed presence in more than 100 countries worldwide. VitalPBX has generously provided a customized White Label version of Incredible PBX tailored for use with all Incredible PBX and VitalPBX custom applications. Follow this link for a free test drive!
 Special Thanks to Vitelity. Vitelity is now Voyant Communications and has halted new registrations for the time being. Our special thanks to Vitelity for their unwavering financial support over many years and to the many Nerd Vittles readers who continue to enjoy the benefits of their service offerings. We will keep everyone posted on further developments.

- Many of our purchase links refer users to Amazon when we find their prices are competitive for the recommended products. Nerd Vittles receives a small referral fee from Amazon to help cover the costs of our blog. We never recommend particular products solely to generate Amazon commissions. However, when pricing is comparable or availability is favorable, we support Amazon because Amazon supports us. [↩]
- In the unlikely event that Skyetel cannot provide a 10% reduction in your current origination rate and/or DID costs, Skyetel will give you an additional $50 credit to use with the Skyetel service. [↩]


Will this work for the Beaglebone Black?
[WM: No.]
Can this also be installed on a Raspberry Pi 2? What is it using, Wazo or FreePBX?
[WM: RasPi2 should be fine, but slow. This image includes FreePBX 12 GPL modules in the modified GUI, not Wazo. There’s a separate image here for XiVO on the RasPi3 platform. Wazo and XiVO are not well-suited for use on a microSD platform because of the realtime implementation of Asterisk.]
I love your site! It is such a goldmine! I am a programmer and I always wanted to try getting my hand dirty with VOIP, especially on the PI. Thank you so much for all those great info, images and the hard work!
I have a beginner question. I made some research but didn’t find anything satisfying. How do I connect and make call from outside my place? I understand that PortKnock allows only my Public IP and my local network to access the PBX.
I am using a SIP application called Softphone from Acrobits, and inside my private network, it works great! But from outside, no luck. It only works when I am on my VPN.
I believe that this is the expected behavior for security, but is there a solution for users on their mobile with no VPN?
Thank you in advance for pointing me in the right direction!
[WM: Here’s a tutorial that will walk you through whitelisting remote phones with Incredible PBX. The PIAF Forum also is an excellent resource when you hit a snag. Good luck.]
Hi there. the script that runs on this is missing sudo prefixes throughout the second half and fails miserably. Just thought I’d let you know.
[WM: If you follow the tutorial, you won’t have the problem. You forgot to login as root in step #6.]
Thanks for the GREAT work – you and your team. I’ve been with you since the AAH days.
Is it possible to make it support either/both gvoauth and no oauth in the same release. I always have problems getting oauth to work but no oauth seems to work the first time?
I have a RPi-2 working with no auth and do not want to mess up the GV side of things.
[WM: Hi, Tom. Thanks for the kind words. We’ve heard your suggestion from a number of folks, and we’re reconsidering although I hasten to add that Google is going to discontinue support for plain-text passwords sooner rather than later so… you might as well learn how to obtain one. A link is provided in the article to show you how. It’s not hard, and it’s much safer.]
I don’t seem to get opus working. It says it is installed, but I can’t figure out how to enable it. Could you please elaborate?
[WM: Please head over to the PIAF Forum for tech support on Opus. Thanks.]
Is it possible to install this on an existing Pi image? I’d prefer to download scripts (I found reference an older version: incrediblepbx11guiPi.tar.gz ) as opposed to imaging an SD card. I have a few minor apps running I would like to keep in the background.
[WM: Sorry, but it’s gotten too complicated to provide an upgrade script.]
I love running my home Asterisk pbx on pi but having serious troubles with data corruption, database errors, and so forth which leads me to rebuild it every few months. Any recommendations before i migrate away from pi?
[WM: Easiest solution is to add a USB Drive to your RasPi and run everything from there. This tutorial will show you how.]
Great stuff on this site! I was just wondering what is the difference between this version of Incredible PBX and Incredible PBX for XiVO?
[WM: The two products use different GUIs. XiVO takes considerably more horsepower to run because it implements Asterisk Real Time.]
Wondering whether Incredible PBX will work with a $5 Raspberry Pi Zero W? Wonder no more. Setup instructions using WiFi available here.
Hi Ward,
Just wondering if you ever stress tested the P3 with external drive configuration. I am wondering if you have any guesstamates as to how many simultaneous calls it will handle. I am itching to use this at that festival we discussed.
[WM: Haven’t tested it personally. But I think you’ll probably run out of bandwidth before you run out of processor capacity.]
Hi Ward,
I am running PIAF-Green-3.6.5-64 on VBox.
GVoice XMPP is working so far (by July 2018).
May be it is because I use it not so intensive – 5 – 10 calls per week. What do you think about it? Does it make sense to move to the new way?
Thank you
[WM: Count your blessings. The first time you have to reboot or restart Asterisk, you’ll probably be dead in the water. Probably easier to migrate before you actually are forced to. Good luck!]
Step Nine, the install command for the fax is incorrect. It should be:
/root/incrediblefax13-raspi.sh
Hi,
I installed about a month ago Incredible PBX on RPi 3b+ and it works like a charm. I had some issues with a few scripts, but finally, I fixed all of them. Comparing to my previous installation RasPBX and RPi1, this installation is a rocket and adding a new GV support, it’s a game changer.
I have only one problem with incoming faxes. I installed AvantFax and FAX sending works perfectly. But when I try to receive fax using "Fax recipient" and selecting a user (user has enabled FAX and configured email address), all received faxes are emailed to the email address configured on the Modem level in AvantFax instead of emails configured on users level. I do not know if it’s only on my RPi or this function works like that, but I want to email faxes depends on a selected extension. Do you know how to solve it?
[WM: It’s working as designed. For more complex configurations, you’ll need to head over to the PIAF Forum. Lots of good tips on AvantFax configuration there. Good luck!]
Do these instructions work for the Raspberry Pi 3 Model B and NOT the B+? If so, will attempt to get this project started over the weekend.
[WM: Should work just fine with the latest Incredible PBX GVSIP image.]
The supplied config for Callcentric will register, but after a few minutes will cease to accept incoming calls. Following the config instructions on Callcentric.com fixes the problem. You may wish to make a note of this in the supplied config. Thank you for all the work you do on this project!
Facing the same Callcentric issues. Can you share the steps to get the Callcentric fixed?
[WM: https://www.callcentric.com/support/device/freepbx/13 ]
If I do not have a static IP address do I need to setup DDNS and make any modifications to system files?
I am using Vitelity as my trunk supplier.
[WM: No need for DDNS unless you have remote extensions on external sites with dynamic IP addresses.]
In fact, I am running this from the Pi-Model-B hardware, the very old model B, not the pi-3. Since I don’t have many calls per day, the whole thing is working fine for me. Just a FYI.
Just confirming if we want to go from the version 13-13.07 to the 13-13.10 we should backup the settings and do a full installation? Or is there a update script for the dot updates? What is the recommended method. (Hoping this update fixes the issue where ringallv2 stops ringing the initial extension when dialing external number)
[WM: By all means, keep a backup. But you will need to do a fresh install and then cut-and-paste your existing settings into the new server. Restoring a backup would destroy the new setup unfortunately. If your existing platform has Admin->Bulk Handler option, by all means try exporting your settings there, and then import them with the new Bulk Handler module in 13-13.10. Good luck.]
Is everything still cool to use the OBi200 to access a GV trunk with this new setup? If so, is the procedure still the same?
[WM: Haven’t used it lately but haven’t heard any complaints either.]