

 JUST RELEASED: Visit the Incredible PBX Wiki
![]() Want a rock-solid PBX at a rock-bottom price: free! Asterisk@Home 2.7 has hit the street with some new goodies and a new release of Asterisk®. So here we go again. With this update, you get version 1.2.5 of Asterisk as well as the latest and greatest version of Linux, CentOS 4.2, the latest Festival Speech Engine (1.96), the latest version of the Asterisk Management Portal (1.10.010), the Flash Operator Panel (version 0.24), Open A2Billing, Digium card auto-configuration, loads of AGI scripts including weather forecasts and wakeup calls, xPL support, the latest SugarCRM Contact Management System with the Cisco XML Services interface and Click-to-Dial support, Microsoft File Sharing and Networking support through Samba (3.0.10), plus dozens and dozens of free utility software applications for Asterisk compliments of Nerd Vittles. And, yes, Asterisk@Home 2.7 still fits on a single CD! By popular request, we've also added something new in this tutorial: some tips and tricks to assist those of you upgrading from a previous version of Asterisk@Home. No, you can't just copy your old config files over and expect things to work. But, in the Nerd Vittles' tradition, we'll show you how to take most of the torture out of the upgrade process. For those new to Nerd Vittles, be aware that we make slipstream changes to articles as users discover things we've missed in our first pass. So check for Comments before you begin or subscribe to our Comments RSS Feed. And add yourself to our Frappr map.
Want a rock-solid PBX at a rock-bottom price: free! Asterisk@Home 2.7 has hit the street with some new goodies and a new release of Asterisk®. So here we go again. With this update, you get version 1.2.5 of Asterisk as well as the latest and greatest version of Linux, CentOS 4.2, the latest Festival Speech Engine (1.96), the latest version of the Asterisk Management Portal (1.10.010), the Flash Operator Panel (version 0.24), Open A2Billing, Digium card auto-configuration, loads of AGI scripts including weather forecasts and wakeup calls, xPL support, the latest SugarCRM Contact Management System with the Cisco XML Services interface and Click-to-Dial support, Microsoft File Sharing and Networking support through Samba (3.0.10), plus dozens and dozens of free utility software applications for Asterisk compliments of Nerd Vittles. And, yes, Asterisk@Home 2.7 still fits on a single CD! By popular request, we've also added something new in this tutorial: some tips and tricks to assist those of you upgrading from a previous version of Asterisk@Home. No, you can't just copy your old config files over and expect things to work. But, in the Nerd Vittles' tradition, we'll show you how to take most of the torture out of the upgrade process. For those new to Nerd Vittles, be aware that we make slipstream changes to articles as users discover things we've missed in our first pass. So check for Comments before you begin or subscribe to our Comments RSS Feed. And add yourself to our Frappr map.
The installation process is pretty straightforward. You need a dedicated machine for this install although, for Windows users, here's another option that doesn't require a dedicated machine. The VMware edition from vmwarez.com runs in a window on your Windows XP or 2000 desktop and has been updated to version 2.7. You can download it here. The Asterisk@Home project now supports a VMware version as well. Just download asteriskathome_27.exe and then download and install the VMware Player.
For now, however, we're assuming you're doing the dedicated machine install: pure Linux on a clean machine. So begin by downloading the 2.7 ISO image from here, burn a CD (click here if you need a refresher course), use an old clunker PC or a $200 WalMart special, insert the CD you made, plug your machine into the Internet and turn it on. Then watch while Asterisk@Home loads CentOS/4.2 and all the Asterisk and Linux goodies imaginable: Apache, SendMail, Asterisk Mail, SugarCRM, MySQL, PHP, phpMyAdmin, SSH, Bluetooth, the Asterisk Management Portal, the Flash Operator Panel, Call Detail Reporting, and on and on. We've covered how to use most of the Linux products in our Mac HOW-TO's (see sidebar), and they work exactly the same way with Asterisk@Home so keep reading. And, yes, this install will reformat (aka ERASE) your hard disk before it begins, but it now warns you first.
Upgrading Asterisk@Home from a Prior Version. In a nutshell, YOU CAN'T. But there is a way to put most of Humpty back together again once you've installed the 2.7 system. Before you begin, understand that you are doing this AT YOUR OWN RISK. NO GUARANTEES. If that bothers you, don't do it! The real trick is to do a little printing and copying of your old data before you insert that 2.7 installation disk. Step 1 is to make a full backup of your old system to a different server before you begin. If you don't know how, read our step-by-step instructions on the subject here. Step 2 is to make another copy of some of the critical files in your system. Duplicates of all of these will also be part of your backup. We typically build directories on a separate server which match the ones we'll be copying over from the old Asterisk system. Here are the directories (including all the subdirectories therein) that we always duplicate. Before you just blindly copy our list, stop and think whether there are special things you do on your existing Asterisk system or special apps that you run. Then find those files and make copies of all of them, too. The important piece in making a successful copy of some of these files is to shut down Asterisk (amportal stop) and MySQL (/etc/init.d/mysqld stop) before you begin. NOTE to CRM users: There's a new version of CRM in AAH 2.7 so it's unlikely that you can restore the databases. Check your current version of AAH (help-aah) and see if there is an option (bundle-crm) to pack up CRM to move it to another machine. If so, do it and follow the instructions.
/var/lib/asterisk/agi-bin

/var/www/html

/var/lib/asterisk/sounds/custom

/var/lib/mysql

/root

/etc/asterisk
Then there are a couple of individual files that you'll also want to preserve:
/etc/hosts

/etc/crontab
The third step is to take screenshots of every screen you've built using the Asterisk Management Portal (AMP). Start with the Incoming Calls tab and go right down the list. For each option in which you have multiple entries (e.g. Extensions and Trunks), call up each entry and print out the full page. Be especially careful in printing the Trunks entries and make sure you write down every line in the PEER Details and USER Details because those which are out of view will not get printed using a screen print. You'll need to manually fill in the ones that aren't displayed. The same goes for Registration Strings which often scroll out of view on the screen. Finally, using CLI, make a copy of all your Asterisk database entries: database show.
Loading CentOS/4 and Asterisk 1.2.5. Here's how the 2.7 install went for us, and we'll walk you through getting everything set up so that it can be used as a production server. Once the install begins, you can expect to eat up about 25 minutes with the CentOS 4.2 install. The install CD then will eject itself, reboot the system, and begin the Asterisk compile and installation. That takes about 25 more minutes to complete.
Securing Your Passwords. When it's finished and reboots, log in as root with password as your password. Type help-aah for a listing of the five passwords that need to be changed. Change them all NOW!
passwd

passwd admin

passwd-maint

passwd-amp

passwd-meetme
Getting the Latest CentOS Updates. Once your system is secure, load all of the application updates for CentOS 4.2. There now are over 50 updates and installs so be patient. If you have zaptel cards, read this thread first! The update command to issue is yum -y update.
Activating Bluetooth Support. Once the updates are completed, activate Bluetooth support if you plan to use it with our Follow-Me Phoning proximity detection application. Run setup, down arrow to System Services, press ENTER, down arrow to bluetooth and press the space bar, tab to OK, press ENTER, tab twice to Quit and press ENTER.
Rebuilding Zaptel. Every time there is a kernel update with yum (which is the case here), ZAP device support needs to be rebuilt using the new kernel. Unfortunately, a RedHat bug caused the rebuilding process to fail. Here's the fix. Log into your new server as root and issue the following commands:
cd /usr/src/kernels/2.6.9-34.EL-i686/include/linux

mv spinlock.h spinlock.h.old

wget http://nerdvittles.com/aah27/spinlock.h

shutdown -r now
Once the reboot completes, you can rebuild support for your ZAP devices or ztdummy if you have no ZAP devices. Log in as root again and type the following command: rebuild_zaptel. Then reboot your system: shutdown -r now. Now log in as root again and type amportal stop and then genzaptelconf. Reboot once more and you're all set to go: shutdown -r now.
Simplifying SSH. If you're going to be connecting to other servers from your new Asterisk@Home 2.7 system using SSH or SCP, then build your new RSA key pair now. This lets you use SSH and SCP (secure copy) without having to enter a password each time. You can also automate backups and proximity detection scripts as we've explained previously here. Log in to your new Asterisk@Home 2.7 server as root. From the command prompt, issue the following command: ssh-keygen -t rsa. Press the enter key three times. You should see something similar to the following. The file name and location in bold below is the information we need:
Generating public/private rsa key pair.

Enter file in which to save the key (/root/.ssh/id_rsa):

Enter passphrase (empty for no passphrase):

Enter same passphrase again:

Your identification has been saved in /root/.ssh/id_rsa.

Your public key has been saved in /root/.ssh/id_rsa.pub.

The key fingerprint is:

1d:3c:14:23:d8:7b:57:d2:cd:18:70:80:0f:9b:b5:92 root@asterisk1.local
Now copy the file in bold above to your other Asterisk servers, Linux machines, and Macs. There's probably a way on PCs as well, but I've given up on that platform particularly after Sony's latest security stunt so you're on your own there. From your Asterisk@Home 2.7 server using SCP, the command should look like the following (except use the private IP address of each of your other Asterisk or Linux servers instead of 192.168.0.104). Provide the root password to your other servers (one at a time) when prompted to do so.
scp /root/.ssh/id_rsa.pub root@192.168.0.104:/root/.ssh/authorized_keys
On a Mac running Mac OS X, the command would look like this (using your username and your Mac's IP address, of course):
For user access only: scp /root/.ssh/id_rsa.pub wardmundy@192.168.0.104:/Users/wardmundy/.ssh/authorized_keys

For full root access: scp /root/.ssh/id_rsa.pub root@192.168.0.104:/var/root/.ssh/authorized_keys
Once the file has been copied to each server, try to log in to your other server from your Asterisk@Home 2.7 server with the following command using the correct destination IP address, of course:
ssh root@192.168.0.104
You should be admitted without entering a password. If not, repeat the drill or read the complete article and find where you made a mistake. Now log out of the other server by typing exit.
Installing WebMin. We don't build Linux systems without installing WebMin, the Swiss Army knife of the Linux World. You can use it to start and stop services, check logs, adjust startup scripts, manage cron jobs, babysit your SendMail server, and many, many other tasks that are downright painful without it. If you ever need help from others, WebMin is a great tool for letting others help you.
There are lots of ways to install WebMin. We prefer the easy way which is to issue the following commands at a Linux prompt after logging in as root. Note: WebMin updates come out all the time. If you want to be sure you start with the latest and greatest version, go to their web site first and write down the number of the current version. Then substitute it below when issuing these commands.
cd /root

mkdir webmin

cd webmin

wget http://internap.dl.sourceforge.net/sourceforge/webadmin/webmin-1.260-1.noarch.rpm

rpm -Uvh webmin*
WebMin runs its own web server on port 10000. To start WebMin, issue this command: /etc/webmin/start. You access it with a web browser pointed to the IP address of your Asterisk box at that port address, e.g. http://192.168.0.108:10000. The login name is root. Then type in your root password and press enter. The main WebMin screen will display. We really don't want the WebMin server starting up each time the OS reboots so do the following. Once you're logged in to WebMin, choose System->Bootup and Shutdown and then click on webmin. Click the No button beside Start at boot time, and then click the Save button. Before we forget, we need to also make one change to the new Asterisk@Home configuration to avoid problems down the road. The default RTP listening ports for Asterisk@Home are set to 10000 to 20000 so there's a conflict on port 10000 with WebMin. Log in as root and, using an editor, call up the rtp.conf file: nano /etc/asterisk/rtp.conf. Now change the rtpstart port from 10000 to 10001 and save the change: Ctrl-W, Y, and press Enter. Then restart Asterisk: amportal restart. Finally, to stop WebMin when you're finished using it, issue this command: /etc/webmin/stop. You can restart it any time you need it, and then use a web browser to access it. But there's no need to waste processing resources.
IP Configuration for Asterisk. We need a consistent IP address or domain name both on your internal network and externally if you expect to receive incoming calls reliably. There are three pieces to the IP configuration: (1) setting the internal IP address of your Asterisk server, (2) configuring an external qualified domain name which will always point to your router/firewall, and (3) configuring your router to transfer incoming Asterisk packets to your Asterisk server. Log into your server as root using your new password. Now type ifconfig eth0 (that's "e-t-h-zero") then enter, and write down both your inet addr and your HWaddr on the Ethernet 0 interface, eth0. Inet addr is the internal IP address of your Asterisk box assigned by your DHCP server (i.e. your router/firewall). HWAddr is the MAC address of your Asterisk server's eth0 network card. To assure a consistent internal IP address, you can either configure your router/DHCP server to make certain that it always hands out this same address to your Asterisk machine, or you can manually configure an IP address for this machine which is not in the range of addresses used by your DHCP server. Almost all routers now make it easy to preassign DHCP addresses so we prefer option 1. It's generally under the tab for LAN IP Setup and is generally called something like Reserved IP table. Just add an entry and call it Asterisk PBX and specify the IP address and MAC address that you wrote down above. Now each time you reboot your Asterisk server, your router will assign it this same IP addreess. To assure a consistent external address is a little trickier. Unless you have a static (fixed) IP address, you'll want to use a Dynamic DNS service such as dyndns.org and configure your router to always advertise its external IP address to dyndns.org. DynDNS.org will take care of revising the IP address associated with your domain name when your ISP changes your dynamic IP address. Then you can configure your VoIP provider account using your fully-qualified dyndns.org domain name, e.g. windswept.dyndns.org provides access to our beach house network even though Time Warner cable hands out dynamic IP addresses which change from time to time. Finally, you'll need to log into your router and redirect certain incoming packets to the internal IP address of your Asterisk machine. If you want external access to the Apache web server on your Asterisk machine, then map TCP port 80 to the internal IP address of your Asterisk system. For WebMin external access, map TCP port 10000 to your Asterisk system. If you want remote access to your Asterisk system via SSH, then map TCP port 22 to the internal IP address of your Asterisk system. If you want external IP phones or other Asterisk servers to be able to communicate with your Asterisk system, then map the following UDP port ranges to the internal IP address of your Asterisk system:
SIP 5004-5082

RTP 10001-20000

IAX 4569
For more details, read our full article on the subject.
Restoring Settings from a Previous Version of Asterisk@Home. If you're building a new system for the first time, skip down to Basic System Configuration. For those of you already running an older version of Asterisk@Home, here's where the fun begins. Get out your AMP screen prints which you made previously. Start up the Asterisk Management Panel (AMP) by pointing a web browser at the IP address of your new system. If you don't know the IP address, log in as root and type ifconfig. The IP address shown under eth0 is typically the address you need. Once AMP loads, start at AMP->Settings->Trunks and recreate entries to match all the Trunk entries on your prior system. After you've added your trunks, delete the default ZAP/g0 trunk unless it was part of your prior configuration. Click the Red Bar to reload your changes.
Next, reenter all of your Outbound Routes and then delete the 9_outside default route unless it was part of your earlier configuration. Make sure the priority order of your new routes matches that of your old routes. If not, use the arrow keys beside the various routes to adjust the order to match. Then click the Red Bar to save your changes.
Step 3 is to recreate all of the Extensions from your previous system. Be sure that both the device technology and extension numbers match your old system. Otherwise, customizations in your extensions_custom.conf file may no longer work. If you have extensions outside your firewall, you'll need to edit those entries after creating them in order to change the NAT, CanReinvite, and Qualify settings. When you're finished adding and editing all of your extensions, click the Red Bar to save your changes.
Step 4 is to recreate all of your Ring Groups. Make sure you use the identical numbers for your new ring groups. When you're finished, click the Red Bar to save your changes.
If you're using a Digital Receptionist (AutoAttendant) or Call Queues with voice prompts, now is a good time to copy your custom voice prompts to the new system. Copy all of the prompts from your old system to /var/lib/asterisk/sounds/custom and then log into your server as root and adjust rights the file (chmod 775 /var/lib/asterisk/sounds/custom/*) and ownership of the files: chown asterisk:asterisk /var/lib/asterisk/sounds/custom/*. Now copy all of the files beginning with aa to the PC on which your web browser is being used to access AMP. Then delete all of the aa files: rm -f /var/lib/asterisk/sounds/custom/aa*.wav. You need local copies of these files to recreate your autoattendants using AMP's Digital Receptionist.
Rebuild your Digital Receptionist entries next. If you have custom sound files, upload them in AMP from your local hard disk and test them to be sure everything is working. Now you can recreate your Call Queues and make the entries match your prior setup. Next, adjust the General Settings and then the Incoming Calls setup to match your previous configuration. Click the Red Bar to save your changes.
The next step is an important one. We want to add the information from your old extensions_custom.conf file to the new /etc/asterisk/extensions_custom.conf file without destroying the new entries in the new file. First, make a duplicate of the new file while logged in as root: cp /etc/asterisk/extensions_custom.conf /etc/asterisk/extensions_custom.conf.bak. Now print out the contents of both files and label them as OLD and NEW. Mark out sections in the OLD file that match information in the NEW file. Then carefully cut-and-paste the missing information contained in your OLD file into the NEW file. Be sure you put pieces of code in the same relative position. Information in these configuration files is divided up into contexts which always start with a heading like this: [from-external-custom]. A context ends when the next heading appears in the file. So make sure that entries from your OLD file appear in the same context in the NEW file. This is especially important with the [from-external-custom] context at the top of the file. Save your changes. Then repeat the same drill with sip.conf and features.conf. There shouldn't be many changes in these. Then make backup copies of vm_email.inc and vm_general.inc, and copy your old versions over to the new server. Change permissions (chmod 777 /etc/asterisk/vm*.inc) and ownership (chown asterisk:asterisk /etc/asterisk/vm*.inc) on these two files. Once you're finished, reload Asterisk: amportal restart.
Next, you'll need to copy back all the files you saved for /var/lib/asterisk/agi-bin and /var/www/html. Don't overwrite any existing files on the new system unless you've first made a backup copy of the file and you know what you're doing. Once you get the files copied back, you'll need to adjust ownership of the files and permissions. It's OK for root to own files in the web directories. Do it for any subdirectories as well.
chown asterisk:asterisk /var/lib/asterisk/agi-bin/*

chmod 775 /var/lib/asterisk/agi-bin/*

chmod 775 /var/www/html/*
Next, you'll need to restore your MySQL and Asterisk database entries. Make backup copies of any new databases you intend to overwrite first! There are several important pieces in making a successful restore of some of these files. First, shut down Asterisk (amportal stop) and then MySQL (/etc/init.d/mysqld stop). Now copy the full directories back over and put them under /var/lib/mysql. Then you'll need to adjust the ownership and permissions to match what MySQL expects, or they won't work when you restart MySQL. Each MySQL database has a matching directory name in /var/lib/mysql. Set the ownership of each directory: chown mysql:mysql directoryname. Set the permissions for each directory: chmod 700 directoryname. Then cd directoryname, reset file ownership for all files (chown asterisk:asterisk *), and reset file permissions for all files (chmod 660 *). Once you finish, restart MySQL: /etc/init.d/mysqld start. Then restart Asterisk: amportal start. Finally, using Asterisk CLI, restore any custom database entries you made with database put commands. Whew!
Now skip down to Activating Email Delivery of VoiceMail Messages and continue with the install.
Basic System Configuration. To get a basic Asterisk system up and running, you only need to do a few things. First, you need an Outbound Trunk to actually deliver your outbound calls to Plain Old Telephones (POTS). Second, you need to configure an Outbound Route to tell Asterisk which trunk to use to deliver your outbound calls to the intended recipients. Third, you'll need an Inbound Route to send incoming calls to a phone on your system. Finally, you'll need to configure at least one extension so that you can plug in some sort of telephone instrument to place and receive calls using your new Asterisk server. The phone can be a hardware device such as an IP telephone or a POTS phone, or it can be a software device such as a free IP softphone. The advantage of IP telephones and softphones is that they require no additional hardware besides your Asterisk server. A POTS phone or our favorite, a 5.8GHz wireless phone system with up to 10 extensions, both require an additional piece of hardware although some of the newer IP wireless phones give you the best of all worlds (see inset). To use a POTS phone, the hardware required is either a circuit board with an FXS port or an external black box (ATA device) such as a Sipura SPA-1001. If you also want to connect your Ma Bell phone line to your Asterisk server, then you need a circuit board with an FXO port or an external black box (ATA device) such as a Sipura SPA-3000. Our favorite is the SPA-3000 because it has both FXO and FXS ports in a box the size of a pack of cigarettes for under $100.
Setting Up An Outbound Trunk. You configure an outbound trunk using your web browser and the Asterisk Management Portal (AMP). But first, you have to have an account with a service provider. This is the company that carries your calls from your Asterisk server to plain old phones in your neighbor's house or Aunt Betty's in California. With VoIP, it's a good idea to have two providers, but today let's start with one. We'll save you some time and lots of money. Unless you make substantial international calls regularly, use TelaSIP/VoipExpress. If you want to know why, read the full article here. Or just try a free call for yourself using our server. Basically, $5.95 a month gets you a local number in your choice of area code with free incoming calls, and 2¢ per minute for outbound calls to anywhere in the U.S. $9.95 a month buys you all of that plus free outbound calls in the area code of the phone number you select. $14.95 a month gets you a number in the area code of your choice with unlimited incoming calls and unlimited outbound calls to anywhere in the U.S. There are no sneaky add-on fees and no obnoxious terms of service. Just be sure to tell them to configure your account for use with Asterisk. They also have very reasonable business plans. If, on the other hand, you'd prefer to try another provider, take a look at our easy setup guides for most of the major VoIP providers here. Finally, a word to the wise about phone plans. Don't expect to sign up for a residential plan and use it all day and night for your business. In addition to being dishonest, it's also quite obvious at the hosting provider's end. Not only will you lose your account, you may also be liable for the entire cost of the business use of the connection.
Once you have your account name and password, point your web browser to the IP address of your new Asterisk@Home 2.7 server and log in as maint with the password you selected. Then choose AMP->Setup->Trunks->Add SIP Trunk assuming you're using TelaSIP. NOTE to existing users: if you already have an Asterisk server using your TelaSIP account, don't use the same account at the same time on your new Asterisk@Home 2.7 server! Plug in the CallerID number you were assigned for your account. Set Maximum Channels to 2. For the Dial Rules, use the following (substituting your local area code for 404 below):
1|NXXNXXXXXX

NXXNXXXXXX

404+NXXXXXX
In the Outgoing Settings section, name your trunk telasip-gw. Then enter the following for the Peer Details using your own account name for username and fromuser and using your own assigned password for secret. Be sure to enter the correct host that was assigned to your account:
context=telasip-in

dtmfmode=rfc2833

fromuser=youraccountname

host=gw4.telasip.com

insecure=very

secret=yourpassword

type=peer

username=youraccountname
Leave the Incoming Settings section blank, and in the Registration String, enter the following using your account name and password:
youraccountname:yourpassword@gw4.telasip.com
Click the Submit Changes button, and then click the red bar to reload Asterisk. Now we need to add the context which will actually process the incoming calls from TelaSIP. Choose AMP->Maintenance->Config Edit->extensions_custom.conf and add the following code at the bottom of the file substituting your new phone number for 4041234567. Save the file and reload Asterisk to finish the setup. See the Comments to this post for a more versatile approach which will let you use your TelaSIP line for Ring Groups.
[telasip-in]

exten => 4041234567,1,NoOp(Incoming call on TelaSIP #4041234567)

exten => 4041234567,2,Dial(local/200@from-internal,20,m)

exten => 4041234567,3,VoiceMail(200@default)

exten => 4041234567,4,Hangup
Configuring an Outbound Route. Now we need to tell Asterisk where to send our outbound calls when we dial them. To get started, we'll just send everything to the TelaSIP trunk we just configured. Choose AMP->Setup->Outbound Routing->Add Route. For Route Name, use Outside. Leave the password blank. For Dial Patterns, enter the following:
NXXXXXX

NXXNXXXXXX

1NXXNXXXXXX
For the Trunk Sequence, choose SIP->telasip-gw from the drop-down list. Then click Submit Changes. Be sure you also delete the sample outbound route that came with the install, or your outbound calls may go nowhere. Finally, click the red bar to save your new Outbound Routing setup.
Configuring an Extension. You have to have an extension to make and receive calls with Asterisk@Home so let's build one. Choose AMP->Setup->Extensions->SIP to begin. For the Extension Number, let's use 200 to keep things simple. For the Display Name, make up something that tells where this phone will be located, e.g. Kitchen. For the Outbound CID, use 200. For secret, make up a password for this extension. For Voicemail and Directory, choose Enabled. Plug in your password again. Type in your email address, and, if you want to also be paged when you get a new voicemail, type in a pager email address. Click the Yes button beside Email Attachment, and leave the other settings alone. Now click the Submit button and then click the red bar to save your changes and reload Asterisk.
Downloading a Free Softphone to Test Asterisk. Unless you already have an IP phone, the easiest way to get started and make sure everything is working is to install an IP softphone. You can download a softphone for Windows, Mac, or Linux from CounterPath. Or download the pulver.Communicator. Here's a new IAX softphone for all platforms that's great, too, and it requires no installation: Idefisk. All are free! Just install and then configure with the IP address of your Asterisk@Home 2.7 server. For username and password, use your extension number and password from above. Once you make a few test calls, don't waste any more time. Buy a decent SIP telephone. We think the best value in the marketplace with excellent build quality and feature set is the under $100 GrandStream GXP-2000. It has support for four lines, speaks CallerID numbers, has a lighted display, and can be configured for autoanswer with a great speakerphone. Short of paying three times as much, that's as good as desktop phones get. If you want to use Asterisk throughout your home, buy a good 5.8GHz wireless phone system with plenty of extensions (our two favorites are shown in the insets below) and then purchase an SPA-3000 to connect up both your home phone line and all your cordless phones. Our tutorial will show you how. The final option is to use a wireless IP phone which is the best of both worlds, a cordless phone that talks IP telephony without an ATA blackbox such as the Uniden UIP1868 (see also insets above).
Activating Email Delivery of VoiceMail Messages. When you're out and someone leaves you a voicemail message, Asterisk@Home will let you forward that voicemail message to your email address as a .wav file which can be played within most email client software. Or you can have Asterisk@Home send an instant message to your cell phone or pager telling you who called, what their phone number was, and how long a voicemail message the person left for you. Or you can do both. In addition, you can tell Asterisk@Home whether to delete the voicemail from your Asterisk server after sending it to your email account. In short, you now can manage all of your incoming email and voicemail from a single place, your email client. In order to send out emails from your Asterisk@Home server, you'll need to make a few changes. First, make this adjustment to the /etc/hosts file on the server. Since anonymous emails are blocked by most ISPs, you'll need a fully-qualified domain name for your server. If you don't have your own domain, the easiest alternative is to use the fully-qualified domain name that your ISP assigns to the IP address for your broadband connection. Don't forget to update it when your ISP changes your IP address! To find out what your fully-qualified domain name is, go to a command prompt on your Asterisk server and type: nslookup 123.456.789.001 substituting your public IP address for the preceding numbers. Then write down the name entry without the trailing period. Now edit the hosts file: nano /etc/hosts. Move the cursor to the second line which reads 127.0.0.1 asterisk1.local , and then move the cursor over the first letter of the first domain name shown, usually asterisk1.local. Now type in the fully-qualified domain name you previously wrote down and add a space after your entry. Don't erase the existing entry! Save your settings: Ctrl-X, y, enter. Now restart network services on your Asterisk machine: service network restart. Next, you need to modify the email message which delivers your voicemails so that it includes your fully-qualified domain name. Don't do this in AMP, or you'll mess up the formatting of the email message. You can download a fresh copy here if you need it. Instead, use nano: nano -w /etc/asterisk/vm_email.inc. Press Ctrl-W, type /cgi, and press the enter key. You're now positioned where you need to type either the fully-qualified domain name for your Asterisk server or the private IP address if you only want to read your emails from behind your firewall. When you start typing, the text display is going to jump all over the place because of word wrap. Don't freak out. You haven't messed anything up. Once you complete your entry, don't erase or change anything else. Save the file: Ctrl-X,Y, then enter. Now go into AMP->Maintenance->Config Edit->vm_general.inc with a web browser. Change the serveremail entry to an email name at the fully qualified domain you used in your /etc/hosts file above. Then save your configuration and restart Asterisk. If you continue with this setup and still don't receive emails, here's another configuration change that is sometimes necessary. You'll also need to do it if you reloaded settings from an older version of Asterisk. On the Asterisk terminal, log in as root. Switch to the directory where the SendMail configuration file is stored: cd /etc/mail. Make a backup of the config file: cp sendmail.cf sendmail.cf.bak. Then issue the following command: echo CGasterisk.dyndns.org >> sendmail.cf. Substitute the actual domain name of your Asterisk server for asterisk.dyndns.org, but be sure it's preceded by CG with no intervening spaces.Then reboot your server and try again: shutdown -r now. Finally, if your ISP doesn't permit downstream mail servers (that's you), then take a look at this link which will show you how to designate your ISP as your SMTP smart host using SendMail.
To configure the voice mail forwarding options, go into the Setup tab of the Asterisk Management Portal using a web browser. Click on Extensions and then click on an extension you already have configured. In the Voicemail and Directory section of the form, enter either (or both) your email address and your pager or cellphone's text messaging address. To email the voicemails as attachments, just click Yes beside Email Attachment. To delete the voicemail message from your voicemail inbox after sending it to your email address (not recommended until you first get it working correctly), click Yes beside Delete Vmail.
Call Recording Fixed. This update fixes inbound and outbound call recording which now works reliably. You can set your preferences for call recording when you set up each extension. The recordings are stored in /var/spool/asterisk/monitor unless you set other preferences in agents.conf.
Paging Fixed. If you want to use paging with your Asterisk system, the sound card problems in Asterisk@Home 2.1 and Asterisk 1.2 have been resolved. Review this posting on SourceForge for additional details. It now works with full and half-duplex sound cards. Thanks, Tracy!
Wakeup Calls Good News & Bad News. The good news is that Asterisk@Home 2.7 includes the latest version of the Wakeup Call program, and the default setup works. Just dial *62. The bad news is that the "annoy" option which is supposed to force the user to key in a number to prove they're awake still doesn't work.
Adjusting Call Parking Extensions. Traditionally, pressing the pound key (#) and dialing extension 700 parked a call on Asterisk@Home systems and notified you of the parked extension. The call then could be picked up by dialing the parked extension in the range of 701 to 799 from any extension on your system. The new setup is to press # and dial 70 to park a call and 71-79 to pick it up. If you prefer the old setup, you'll need adjust the settings in features.conf. Go to AMP->Maintenance->Config Edit->features.conf and make it look like this:
[general]

parkext => 700                          ; What ext. to dial to park

parkpos => 701-799                      ; What extensions to park calls on

context => parkedcalls                  ; Which context parked calls are in
Directory Lookup Fixed Sorta. When callers press pound (#) after a voicemail pick up, it now activates a directory lookup function using AMP if you set Company Directory to first or last name in General Settings.
Max Channels Bug Remains. A bug has been reported because of a deprecated command that makes Asterisk@Home's calculation of maximum channels invalid. To fix it, goto AMP->Maintenance->Config Edit->extensions.conf->macro-dialout-trunk and comment out line s,7 so that it looks like this:
;exten => s,7,CheckGroup(${OUTMAXCHANS_${ARG1}})
Then insert a new line s,7 just below it which looks like this:
exten => s,7,GotoIf($[ ${GROUP_COUNT()} > ${OUTMAXCHANS_${ARG1}} ]?108)
Then click the Update button and reload Asterisk to activate the change.
Syntax Error in extensions.conf Causes Failed Incoming Calls. One of our readers has discovered a nasty little bug in extensions.conf that will cause some incoming calls to fail. Edit extensions.conf->macro-dial and change line s,22 as follows. Then reload Asterisk.
Before:
exten => s,22,GotoIf($[$[${HuntMembers} >= 1]?30 )
After:
exten => s,22,GotoIf($[$[${HuntMembers}] >= 1]?30 )
Adding Cellphone Extensions. It's really easy to add "extensions" which dial directly to your cellphones or phones in remote locations. Just create a new Ring Group, give it a Group Number that matches the extension number you want to dial to complete the call (e.g. 244), choose hunt for the Ring Strategy, enter your cellphone number in the extension field with a # on the end using a dial string that matches your outbound trunk requirements (e.g. 16781234567# if your provider requires a 1-areacode-number format), choose a ring time in seconds, and a destination if no answer. If you want to have Asterisk track you down, enter several different phone numbers in the extension list. If you change hunt to ringall then all of the numbers will be called simultaneously instead of sequentially. Save your Ring Group entry, click the Red bar to reload Asterisk, and then dial the Ring Group extension number from any phone on your system. Presto!
Tweaking SIP.conf. There are a few changes we recommend you make in the [general] context of the sip.conf file. Using the Asterisk Management Portal, go to AMP->Maintenance->Config Edit->sip.conf. It's a good idea to include your actual CallerID number of your default outbound trunk here instead of Default. We also recommend that you add allow=gsm just below the existing allow=alaw line in the file. You may also want to include progressinband=yes which assures that callers will hear ring tones when placing calls even if your provider doesn't provide them. This is a fairly common complaint with BroadVoice in particular. Don't forget to reload Asterisk once you make these changes: AMP->Setup->Incoming Calls->Submit Changes and then click the Red bar.
Connecting Remote Extensions or a Remote Asterisk Server. If you plan to connect remote extensions to your Asterisk server, then add the following entries to sip.conf above using your own fully-qualified domain name and the first three octets of the private IP address of your Asterisk server:
externip = myasteriskbox.dyndns.org

localnet=192.168.0.0/255.255.255.0

nat=yes
You'll also either need to define your Asterisk server as a DMZ device in your firewall setup, or you can open the following UDP ports and map all of them to the private IP address of your Asterisk box: 4569, 5004-5082, and 10000-20000. If you only hear half of a conversation with a remote extension, it's usually a NAT problem meaning you probably forgot to do the port mapping drill. We plan to cover remote extensions and interconnecting Asterisk servers in more detail in a future column so stay tuned. In the meantime, if you have a dynamic DNS connection that changes your IP address regularly and you don't want to wrestle with manually updating your Asterisk server each time there's a change, just download chandave's sip reload script and copy it to your /etc/asterisk directory. Then execute the following commands while logged in as root:
chown asterisk:asterisk /etc/asterisk/sip_reload.sh

export EDITOR=nano

crontab -e

00,05,10,15,20,25,30,35,40,45,50,55 * * * * root /bin/sh /etc/asterisk/sip_reload.sh >/dev/null 2>&1
Save your crontab addition in the usual nano way, and you're all set: Ctrl-X, y, then enter. This clever little script will make sure your Asterisk server always knows its own IP address regardless of how often your ISP changes it. And you'll never lose inbound connectivity from remote extensions or servers for over 5 minutes. If you'd like to read the full discussion, visit this link on the Voxilla forum.
Managing Incoming Calls. For long time readers of this column, you already know that our recommended strategy for handling incoming calls is to set up a simple Stealth AutoAttendant. Basically, this is a welcome message that greets your callers and then transfers them to an extension or ring group of your choice. The advantage of this approach is that it also lets callers like you press buttons to navigate through various options on your Asterisk system without advertising them to the public at large. If you're just getting started with Asterisk, you can read all about setting up a Stealth AutoAttendant here. If you'd prefer to manage your incoming calls with AMP, you'll still need to fix the [from-sip-external] context in the extensions.conf file, or all your incoming SIP and IAX calls will ring busy. To fix it, choose AMP->Maintenance->Config Edit->extensions.conf->from-sip-external. Comment out all the lines in the existing file by adding a semicolon at the beginning of each line. Then add the following line, save your changes, and reload Asterisk.
exten => _X.,1,Goto(from-pstn-timecheck,s,1)
New Custom Speed Dialing. Asterisk@Home 2.7 has a built-in speed dialing utility. The reserved speed dial numbers are 300 to 399. Adding a number to your speed dial list is easy. Just pick up an extension and dial 300-3xx-6781234567 where 3xx is the speed dial code you want to create and 6781234567 is the phone number you want dialed when you enter the speed dial code. Just make sure you enter the number to be called in a format that is supported by your Asterisk dialplan, i.e. if outside calls need to be preceded by a 1 or a 9, then the number should be entered in a matching format. You can look up speed dial numbers by dialing an asterisk followed by the 3-digit speed dial code, e.g. *301 would tell you the number stored in speed dial 301. If you need additional flexibility with both web browser and phone access as well as 1 to 5-digit speed dial codes, download our free AsteriDex robodialer.
Fixed A2Billing: Asterisk Calling Card Platform. This web-based application allows you to generate and issue calling cards to individuals so that they can place calls remotely through your Asterisk server. If you've always wanted to be just like AT&T, here's your Big Chance! There's very little that you can do with an AT&T calling card that can't be done as well or better by you using A2Billing. And, it won't take an M.B.A. to undercut AT&T's calling card rates and still make buckets of money. All you need now are a few customers. Heck, I'll sign up with you. I sign up for everything. But first, a word of caution. Assuming your Asterisk server has web exposure on the Internet, you need to secure the admin and root passwords in this application whether you use it or not. To access the application, go to http://192.168.0.104/a2billing/ using the actual internal IP address of your Asterisk server. Log in as root with a password of myroot. Click on the ADMINISTRATOR tab in the left column and then click Show Administrator. Now click on the Edit button beside each of the two administrator accounts and change the passwords to something secure. Documentation for this application is available here. There's also a pretty good step-by-step setup guide for Asterisk@Home here. To use the application, uncomment the 6 actual dialplan lines in extensions_custom.conf and reload Asterisk:
;[custom-callingcard]

;exten => s,1,Answer

;exten => s,2,Wait,2

;exten => s,3,DeadAGI,a2billing.php

;exten => s,4,Wait,2

;exten => s,5,Hangup
SugarCRM Contact Management. Asterisk@Home includes the best open source contact management application on the planet, SugarCRM. You access the application with a web browser: http://192.168.0.104/crm/ substituting the private IP address of your Asterisk box, of course. Specify admin for your username and password for your password. Whether you use the application or not, change the admin password. It's easy. Just click the Administrator link under Welcome admin. Then click the Change Password button. Complete documentation for the application is available here. If contact management is your thing, knock yourself out, and we'll talk to you next spring when you finish getting everything set up to run your business. It's a great product, but be prepared to invest lots of time in the project if you expect to use it productively.
Conflict Between ZAP cards and Fax Modules. For those using ZAP cards, be aware that there is a reported conflict with the fax modules. See this link for details and updates.
Incoming Fax Support. The NVfaxdetect software that we showcased back in December, 2005, now is included in Asterisk@Home 2.7. The major advantage of NVfaxdetect is that it works with SIP and IAX trunks as well as ZAP lines. Unfortunately, you'll still need to manually configure the Asterisk Management Portal to use it. Thanks to Thunderbird in Australia, it's pretty easy to make the necessary changes. First, enable faxing support. Go to AMP->Setup->General Settings and set Extension of Fax Machine to system. Then fill in your email address. Click the Submit Changes button to save your changes. This sets the default route for incoming faxes. If you want to specify different fax destinations for different DID trunks, then set up Inbound Routing using AMP and define the fax extension as system (instead of default) with an email address for delivery of the fax for each particular DID. You'll also need to make sure you have outbound email functioning on your Asterisk server (see above), or none of the rest of this matters. NVfaxdetect converts your incoming faxes to PDF documents and then emails them to you. So the next step is to get that conversion functionality working. Log in to your Asterisk server as root and type the following command: install-pdf. Now make a backup copy of your extensions.conf file: cp /etc/asterisk/extensions.conf /etc/asterisk/extensions.conf.bak. Carefully edit extensions.conf: nano -w /etc/extensions.conf. When finished, save your changes and restart Asterisk: amportal restart.
Find and delete the entire [from-pstn-reghours] context. Replace it with the following:
[from-pstn-reghours]

exten => s,1,GotoIf($[${FAX_RX} = disabled]?from-pstn-reghours-nofax,s,1:2) ; if fax detection is disabled, then jump to from-pstn-nofax - else continue

exten => s,2,Answer

exten => s,3,Playtones(ring) ; play fake ring so caller doesn't wonder what's going on

exten => s,4,NVFaxDetect(4) ; detect faxes while playing ring sound - goes to "fax" extension if detected

exten => s,5,SetVar(intype=${INCOMING})

exten => s,6,Cut(intype=intype,-,1)

exten => s,7,GotoIf($[${intype} = EXT]?8:9) ; If INCOMING starts with EXT, then assume its an extension

exten => s,8,Goto(ext-local,${INCOMING:4},1)

exten => s,9,GotoIf($[${intype} = GRP]?10:11) ; If INCOMING starts with GRP, then assume its a ring group

exten => s,10,Goto(ext-group,${INCOMING:4},1)

exten => s,11,GotoIf($[${intype} = QUE]?12:13)

exten => s,12,Goto(ext-queues,${INCOMING:4},1)

exten => s,13,Goto(${INCOMING},s,1) ; not EXT or GR1 - it's an auto attendant

exten => fax,1,Goto(ext-fax,in_fax,1)

exten => h,1,Hangup
Find and delete the entire [from-pstn-afthours] context. Replace it with the following:
[from-pstn-afthours]

exten => s,1,GotoIf($[${FAX_RX} = disabled]?from-pstn-afthours-nofax,s,1:2) ; if fax detection is disabled, then jump to from-pstn-nofax - else continue

exten => s,2,Answer

exten => s,3,Playtones(ring) ; play fake ring so caller doesn't wonder what's going on

exten => s,4,NVFaxDetect(4) ; detect faxes while playing ring sound - goes to "fax" extension if detected

exten => s,5,SetVar(intype=${AFTER_INCOMING})

exten => s,6,Cut(intype=intype,-,1)

exten => s,7,GotoIf($[${intype} = EXT]?8:9) ; If INCOMING starts with EXT, then assume its an extension

exten => s,8,Goto(ext-local,${AFTER_INCOMING:4},1)

exten => s,9,GotoIf($[${intype} = GRP]?10:11) ; If INCOMING starts with GRP, then assume its a ring group

exten => s,10,Goto(ext-group,${AFTER_INCOMING:4},1)

exten => s,11,GotoIf($[${intype} = QUE]?12:13)

exten => s,12,Goto(ext-queues,${AFTER_INCOMING:4},1)

exten => s,13,Goto(${AFTER_INCOMING},s,1) ; not EXT or GR1 - it's an auto attendant

exten => fax,1,Goto(ext-fax,in_fax,1)

exten => h,1,Hangup
Find and delete the entire [ext-fax] context. Replace it with the following:
[ext-fax]

exten => s,1,Answer

exten => s,2,Goto(in_fax,1)

exten => in_fax,1,StopPlaytones ; you must do this or it will play ring sounds over your fax

exten => in_fax,2,GotoIf($[${FAX_RX} = system]?3:analog_fax,1)

exten => in_fax,3,Macro(faxreceive)

exten => in_fax,4,Hangup

exten => analog_fax,1,GotoIf($[${FAX_RX} = disabled]?3:2) ;if fax is disabled, just hang up

exten => analog_fax,2,DBGet(DIAL=DEVICE/${FAX_RX}/dial);

exten => analog_fax,3,Dial(${DIAL},20,d)

exten => analog_fax,4,Hangup

exten => out_fax,1,txfax(${TXFAX_NAME}|caller)

exten => out_fax,2,Hangup

exten => h,1,system(tiff2ps -2eaz ${FAXFILE} | ps2pdf - ${FAXFILE}.pdf)

exten => h,2,system(mime-construct --to ${EMAILADDR} --subject "Fax from ${CALLERIDNUM} ${CALLERIDNAME}" --attachment ${CALLERIDNUM}.pdf --type application/pdf --file ${FAXFILE}.pdf)

exten => h,3,system(rm ${FAXFILE} ${FAXFILE}.pdf)

exten => h,4,Hangup()
Be aware that VoIP faxing is quirky. Here's why. You also may need to adjust the timing mechanism in the actual NVfaxdetect(4) lines above. If 4 doesn't work, try 10 or nothing at all. If you need more details, read our original article on this topic. Be sure to read Comment 25!
Asterisk Recording Interface. A new web-based utility for managing your voicemail now is included in AMP and can be accessed by clicking Voicemail & Recordings on the initial AMP screen at the IP address of your Asterisk system. It also can be accessed at http://Asterisk-IP-address/recordings/. To log in to the Asterisk Recording Interface (ARI), just enter an extension number on your Asterisk system and the password for that extension. From the web interface, you can manage your voicemail messages including playing them back, you can review the call log, and you can set your voicemail password as well as your desired setup for recording calls by setting the call monitor defaults for this extension. Change your ari_admin_password on line 53: nano -w /var/www/html/recordings/includes/main.conf.
Other Out-of-the-Box Utilities. Asterisk@Home 2.7 comes bundled with a number of additional utilities. Here are some of them. You can retrieve the current time by dialing *60. If the time is wrong, you can reset your default time zone by logging into your server as root and typing config. A current weather report for New York is available by dialing *61. You can change the city by following our previous tutorial which is available here. Something has come unglued in the festival script, however, because there is a noticable 10-second delay between each line of text that is read now. To set up a wakeup call from any extension, dial *62. To determine the phone number of any extension, just dial *65. You can use the default MeetMe conferencing system from any or all of your extensions by dialing 8 plus the number of an existing extension. Additional conference rooms can be added by editing meetme_additional.conf. Finally, you can record customized voice prompts for your system by dialing 5678 from any extension. Before this will work, edit the extensions_custom.conf file (AMP->Maintenance->Config Edit->extensions_custom.conf) and uncomment the seven lines shown below which are located at the bottom of the file. Just remove the leading semicolons. You'll also need to uncomment the following line near the top of file at the beginning of the [from-internal-custom] context: ;include => custom-recordme.
;[custom-recordme]

;exten => 5678,1,Wait(2)

;exten => 5678,2,Record(/tmp/asterisk-recording:gsm)

;exten => 5678,3,Wait(2)

;exten => 5678,4,Playback(/tmp/asterisk-recording)

;exten => 5678,5,Wait(2)

;exten => 5678,6,Hangup
Once you make a recording, it needs to be moved to /var/lib/asterisk/sounds/custom with a new filename.gsm, e.g. mv /tmp/asterisk-recording.gsm /var/lib/asterisk/sounds/custom/hihoney.gsm. Then change the ownership of the file: chown asterisk:asterisk /var/lib/asterisk/sounds/custom/hihoney.gsm. You then can play the recording with a line like this in your dialplan: exten=>s,1,Playback(custom/hihoney) where hihoney is the name you assigned to the recording without its .gsm extension.
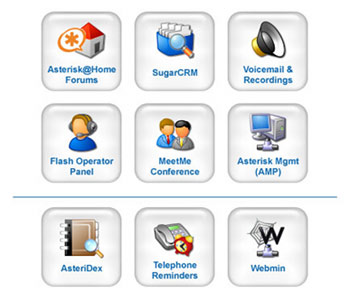 AAH Web Facelift. Last, but not least, the folks at KennonSoft have posted a new self-configuring AAH web interface (see inset). It automatically chooses icons to match the applications installed on your system. Here are the commands to install it. Log into your server as root and issue the following commands:
cd /var/www/html

wget http://www.kennonsoft.org/projects/asterisk/admin-ui.tar

tar -xvf admin-ui.tar

rm -f admin-ui.tar

mv index.html index2.html
NOTE: It's been reported that there may be a display formatting bug with IE 6. Line 2 of the code above should begin with wget.
In order for the bottom row of buttons to appear, you must install WebMin (installation instructions above), AsteriDex, and Phone Reminders 2.5. If you'd like to use our AsteriDex RoboDialer, install it from the link in this sentence and the icon will then appear. If you've moved your AsteriDex application to a directory different than /var/www/html/asteridex, make the necessary adjustment to ./asteridex in line 15 of the index.php file. To download and install the Telephone Reminders software, read our Telephone Reminders 2.5 update tutorial. Once its installed, the Telephone Reminders icon will appear when you access the main web page on your Asterisk server.
Microsoft Networking Support with Samba. Asterisk@Home 2.7 now includes full Linux support for Microsoft Networking with Samba server and client modules. This means your Asterisk server now can be accessed as "Drive G:" from any Windows system. And you can also access your Asterisk system from any Mac or Linux system with Samba support. To install the Samba 3.0.10 modules, log into your Asterisk server as root and issue the following command: setup-samba. Once the installation completes, edit the Samba config and enter the workgroup name of your default Microsoft network in lowercase letters: nano -w /etc/samba/smb.conf. Then restart Samba: /etc/init.d/smb restart. You now can log into asterisk1 share with a username of root and your root password from any Windows PC in the same workgroup or any Mac or Linux machine running Samba in the same default workgroup. Additional Samba customization can be made using WebMin (Servers->Samba Windows File Sharing). Works flawlessly!
 Free Directory Assistance Service. For those in the U.S. that just can't live without Directory Assistance, write this number down or add it to your Asterisk dialplan for free directory assistance calls in the United States: 1-800-411-6387. It's also a free VoIP call with the providers listed below once you set up an account with one of them. You can read our reviews of these providers here. Assuming you have an account, just add ONE of the following sets to the [from-internal-custom] context in extensions_custom.conf:
exten => 411,1,Dial(IAX2/goiax/18004116387)   ; GoIAX Free Call

exten => _1NXX5551212,1,Dial(IAX2/goiax/18004116387)

exten => _NXX5551212,1,Dial(IAX2/goiax/18004116387)
exten => 411,1,Dial(IAX2/fwd/*18004116387) ; FWD Free Call
exten => _1NXX5551212,1,Dial(IAX2/fwd/*18004116387)
exten => _NXX5551212,1,Dial(IAX2/fwd/*18004116387)
exten => 411,1,Dial(IAX2/teliax/18004116387) ; Teliax Free Call
exten => _1NXX5551212,1,Dial(IAX2/teliax/18004116387)
exten => _NXX5551212,1,Dial(IAX2/teliax/18004116387)
Where To Go From Here. After you get a functioning Asterisk system, you're ready to move on to some really cool things that make Asterisk a one-of-a-kind PBX. There are customized weather reports, web and phone-based dialers from a MySQL address book, incoming fax to PDF conversion with email delivery, blacklisting of telemarketers, bluetooth proximity detection so that your home or office calls automatically transfer to your cellphone when you depart with your bluetooth device, and on and on. You'll also want to take a more in-depth look at many of the topics we've covered above. For a complete catalog of all of our Asterisk projects and everything else we've written about Asterisk@Home, go here. Then take a look at a terrific writeup from the other side of the globe: Asterisk@Home for Dumb-Me. Finally, there's an Asterisk@Home Handbook Wiki project under development that's worth a careful look. And, for the latest Asterisk news, don't miss Planet Asterisk.
Some Recent Nerd Vittles Articles of Interest...

Problems have been reported once again with version 2.7 and zaptel cards. We don’t use these cards and the pioneer-of-the-day on the West Coast that tried the fix indicates it did NOT solve the problem if you have zaptel hardware. His comments preceded Comment #8 below so the jury is still out on this one. We have tested it with no zaptel hardware, and it works fine. If your Asterisk system depends upon one or more of these cards, check this thread on SourceForge BEFORE you run yum update on AAH 2.7.
I wonder if upgrading the centOS beyond what is on the A@H iso is even necessary for all the headaches it seems to cause at times. I have an old A@H 2.1 box, never updated centOS, and it seems to do just fine. Is there anything in the centOS updates that is important to asterisk that I have yet to notice?
[WM: Loads of security updates. Without them, your system would soon be toast.]
SSH and keys: A better way of uploading your keys look like the line below:
cat .ssh/identity.pub | ssh user@server.tld "cat - >> .ssh/authorized_keys"
That won’t destroy an already existing authorized_keys.
Great articles, Ward. I’ve been wondering if it wouldn’t be easiest to consider scratching and installing from the tar file rather than scratching your entire CentOS. I know it’s not an "upgrade" path either but the path would seem shorter if your CentOS is reasonably current and had all the supporting environment already configured.
Once you update the OS, have ssh, sendmail, webmin, samba, and the plethora of things required to button down your Linux, wouldn’t it be easier to download the tar and go from there? I find setting up the Linux side the way you want it to be time consuming.
The tar file has an install.sh script. My guess is you’d delete/rename a bunch of the asterisk specific directories and have a simpler and quicker update, much like above, the iso, burning and setting up all the non-asterisk utilities.
If you’re coming from the CentOS4 aah versions you could save a lot of steps.
Thanks for the info on upgrading, I’ve been holding off upgrading my 2.4 system until you explained how! What a pain in the butt though. For an application that’s been built to be so easy to use and install, why does it have to be nearly impossible to upgrade?? But I guess this is the wrong place to be complaining aobut tha 🙂 thanks again for the great article.
Hopefully this isn’t considered ‘tech support’, though it is a general knowledge question on VoIP providers.
I currently have Vonage VoIP service, at $25 a month, and aside from a boatload of other features available with A@H, the TeleSIP is friendlier to the pocket book.
Can a standard broadband connect support two VoIP connections simultaneously? As in, can I set up TeleSIP and make sure everything works and all that, and Then cancel my Voange account? I’d hate to screw something up and have no phone service; but I don’t want to risk packets getting mixed up either.
[WM: With all-you-can-eat plans, you get as many simultaneous connections as you pay for. Typically, you get two so that the provider can support call waiting. But that doesn’t mean you can make two simultaneous outbound calls. You can certainly buy additional connections. With TelaSIP, you can probably get Gene to set them up on a single account if you call them. The pricing I provided is also for home, i.e. NOT BUSINESS, use. No one that I know of provides an all-you-can-eat business plan. And, yes, you can certainly set it up and keep Vonage until you get everything working to your liking. The VoIP connections will not step on each other. We use 8 providers and have no problems.]
The wget for the updated spinlock file caused the newly downloaded file to be created as "spinlock.h.1″ for me (i.e. – didn’t over-write the original). Because of this the zaptel recompile failed until I copied this file over spinlock.h, after which the process worked as outlined above.
Brent
[WM: Thanks. I’ll update the tutorial to rename spinlock.h first.]
P.S. If the solution in the main article doesn’t work for you, try this:
cd /usr/src/kernels/2.6.9-34.EL-smp-i686/include/linux

mv spinlock.h spinlock.h.old

wget -N http://nerdvittles.com/aah27/spinlock.h

shutdown -r now
Hi thanks for these walkthroughs bye the way. What would we do without you.
I am still having trouble getting zap to rebuild even with the patched file. Seems to start rebuilding and then kicks up an error saying module zaptel not found. Then sort of gives up the ghost. Any clues anyone. Im using a diguim tdm400p, i think thats the model.
Thanks.
Rob
[WM: See Rob’s follow-up in #10 below.]
Just about to write back in and say that after renaming, it worked. But then once i had sent the last post, my page refresh showed me that all of it had already been noted and changed. Excellent.
Thanks.
Rob.
[WM: So TDM400 cards appear to work fine with the spinlock.h patch and nothing further. Another user on SourceForge reports that TDM2400P cards require an additional fix. He reports that Digium suggests the following. YMMV!]
nano -w /etc/init.d/zaptel

Under the start context just below the line which begins with "rmmod audio", add these two new lines and save the file:

rmmod wctdm24xxp >& /dev/null

rmmod zaptel >& /dev/null
Dave posted a comment above about upgrading using the tar file and then running the install.sh script. I have tried as have loaded a fair bit of other stuff on my box as well. I am sure I am not alone. I am not sure as to the extent that it worked though as am immediately picking up some SugarCRM patching issues.
It would be a really useful Nerd Vittles article on upgrading AAH if the team could try it and offer it as an alternative upgrade path to wiping the disk.
[WM: Without looking at Andrew’s scripts which put AAH together, it would be a crap shoot to try to guess what can be restored and what can’t. The upgrade method outlined in this article will take most users under an hour to complete. And, with a little luck, you get your data back without trashing any components in the new version. That’s about as good as it gets unless an upgrade system were designed from the ground up. That’s pretty unlikely when you consider that AAH includes code and apps from dozens of different groups of developers who each fly in their own orbits and rarely, if ever, speak to one another. Part of the price you pay for FREE.]
your the fricken best, i have been hanging on your every post since the auto dialer application a little while back and this is another great one it really hits on some things i have overlooked. keep it up it helps more than you know.
WM says this "… AAH includes code and apps from dozens of different groups of developers who each fly in their own orbits and rarely, if ever, speak to one another. Part of the price you pay for FREE…"
Not just for free, I know there are a lot of commercial software vendors in that same boat! MS Anyone? LOL
Thanks for the all the hard work! You certainly are a God Send for us!
We found another vulnerable admin password so please reread the Asterisk Recording Interface section if you read the original article before Day 2.
I’m not an Asterisk Guru, but this may useful at least for newbies.
After the upgrade (yum -y update), i get two new versions on centos boot menu (when you start the computer)
1- Centos(2.6.9-34.ELsmp)
2- Centos(2.6.9-34.EL)
3- …
4- …
I found that the instructions for spinlock.h with th "mv" are fine now. ONLY if i make boot with the 2.6.9-34.EL!!
If i make it with 2.6.9-34.ELsmp it doesn’t find zaptel again…
(even after compilation of zaptel when loaded with 2.6.9-34.EL)
The problem is: the option 1 is default boot… I’m not next to server to go there everytime to load option 2.
Could you help me on this?
[WM: Log into your server as root and carefully edit the boot config file: nano -w /boot/grub/grub.conf. Change the line which reads default=0 to default=1 and reboot your server: shutdown -r now. You should be all set. Notice that grub counts boot options starting at 0 rather than 1 even though they display as 1,2,3,4 when you boot your system.]
A bit wierd: dir-intro-fn.gsm is missing for Directory Lookup when calling from-pstn:
Fixing Directory Lookup. Usually, pressing the pound key (#) from any phone connected to your Asterisk server calls up a directory lookup function using the Asterisk Management Portal (AMP); however, Digium renamed one of the voice prompts in the 1.2 release of Asterisk which broke this function in AMP. If you simply log into your server as root and issue the following command, it will create a symbolic link to the renamed file and will permanently fix the problem:
ln -s /var/lib/asterisk/sounds/dir-intro-fn.gsm /var/lib/asterisk/sounds/dir-intro-oper.gsm
I hope you could help on or we can warn for other newbies…
[WM: There’s an easier fix, and I’ve amended the Directory Lookup section of the article to explain it. Thanks.]
I did fresh install of A@H 2.7 with a tdm400 card using your spinlock.h instructions above. It seems to work just fine. Calls go in and out via pstn okay.
The default boot was 2.6.9-34.EL, the second boot option was the original os version, I believe. The smp did not show up at all. The rmmod fix was not required.
[WM: We’ve gotten the same report from several people now so I think it’s safe to say our original fix solves the problem for those using a tdm400 card. Thanks to all that replied. No need to print 10 of the same.]
I noticed that Since the last update of AMP to 1.10.010 (which is still included in AAH 2.7) there is a password problem with outbound routes with more than one line in dial plan. There is a bug that will only obey the first line in your dial plan, otherwise everything will go through without a password. A patch was posted here:
http://sourceforge.net/tracker/index.php?func=detail&aid=1379795&group_id=123387&atid=696349
I couldn’t get the patch to work, but i think that’s an issue with me not the patch, so I just loaded the new GUI of amp called freePBX which the problem was fixed in this release.
Have you played with this release Ward? Does anyone know why they removed the "maintenace tab" and if there is still a way to get to those features (config edit, asterisk info, etc)apart from command line?
[WM: The Maintenance tab in AMP is added by Andrew, who puts AAH together. So, if you upgrade AMP, you lose the tab unless you know what you’re doing with PHP. Have no fear, there will be another version of AAH once AMP 2.0, now known as freePBX 2.0, is released. Good news! See Comment #24 below. Now you don’t have to wait.]
Your instructions for NAT are right on, but the heading is a little misleading. You might want to make it explicit that this is also needed if you are using an external SIP server (such as TelaSip) instead of just a external extension.
The only other things I haven’t quite figured out is how to either reduce or eliminate CPU usage for mpg123 (which eats up about 94% on my P2 400), and how to point * to a remote Festival server correctly.
OK, answered my question. Look here: http://www.oinko.net/astrecipes/index.php?n=152 This has made a huge difference in my CPU usage.
In the section rebuild zaptel, it states to cd /usr/src/kernels/2.6.9-34.EL-i686/include/linux
My problem is this directory is missing, I do have /usr/src/kernels/2.6.9-34.EL-i586/
Why no 686? any ideas?
[WM: What kind of machine??]
Great article again …. salute to you all ….
I have a question on CRM can it be setup for inbound mail … it seems something is missing after install of @ home 2.7
I had installed it on 2.5 with the tar ball and than had to edit extension to allow for voice mail. I have left a question in @home forum with no answer
Thanks
I’ve been creating SIP extensions on AMP, and manually Adding passwords (on meetme_aditional.conf) to these 8XXX conference rooms automatically created by AMP.
I notice that there are double entries for each extension , i’ve created , and every time i add an extensions, the password for conference rooms (above refered , simply disappear…)
Is there any tip so i can create extensions on AMP and don’t loose meetme passwords …
Best regards,
Marco Mouta
I have modified the php files necessary to bring the maintenance tab back for those that have upgraded AMP to FreePBX (refer to comment #18 above). I have written a small script that replaces the necessary files. The script is really simple, it just adds .old to the end of the existing filenames and then downloads my modified files to their appropriate places. Below are the commands needed to download and apply my script. (feel free to look at my script to see what it does).
cd /root
wget http://tinyurl.com/eoz8o
chmod 775 repair-maint-tab.so
./repair-maint-tab.so
That?��Ǩ�Ѣs all there is to it, enjoy.
[WM: Fabulous. Just what we needed. Can’t wait to try it. Thanks. For those that want to upgrade to FreePBX, here’s a link that’ll show you how. And finally an update: freePBX 2.0 now has been officially released. You can read the early chatter about it live from Australia. Or read the terrific VOIPSpeak Getting Started review and tutorial here.]
hi,
After following all of your instructions to get FAX to Email working, i found that i receive the fax but i couldn’t open it with Outlook.
Then i took a look around on the web , and i found this:
http://www.voip-info.org/wiki/view/Asterisk+and+faxes
" Update ?��Ǩ��� If the above changes do not fix your mime-construct file, verify the version by going to the unix cli (use keyboard or PuTTY) and type "mime-construct –version". I found that even if I updated the script above, It made it to where the attachment wouldn’t come through at all. I checked my version and I had v1.8. I searched and found that there was a slightly newer version 1.9, so I tried it and it seemed to solve my problems.
Procedure: (WM note: I’ve simplified this a bit for new users)
Log into your server as root and issue the following commands:
cd /usr/bin/

mv mime-construct mime-construct.old

wget http://nerdvittles.com/aah27/mime-construct

chmod 555 mime-construct
Now my faxes were attached to my e-mails "
And it worked perfect for me with Asterisk@Home 2.7 and DIgium TE110P , just perfect!
Hope it helps.
Marco Mouta
Just found another password you should change if you leave ftp running: that of ftpuser.
[WM: You are correct, I guess. The ftp server (vsftpd) is running by default, but the only user account ftpuser with password asteriskftp is limited to download access from /var/ftp which is empty. According to the AAH Handbook, the FTP server was included primarily to assist in configuring certain phones. We don’t recommend opening the FTP port on your firewall so FTP access is only available to those on your local network. For the purists, the best approach is probably to shut down the FTP server when you’re not using it: /etc/init.d/vsftpd stop. For Nervous Nellies, you can change the ftpuser password by logging in as root and issuing the following command: passwd ftpuser. If you want to reconfigure your system so that the FTP server doesn’t start by default, use WebMin and go to System->Bootup and Shutdown->vsftpd. Then click on Start at boot time: No and click Save. Thanks for finding the hole, Ian.]
Thank you very much for such easy-to-follow instructions. I do have a question that I am unable to find an answer to searching the forums. I have an spa-3000 and have set it up using your guide. I have CWCID which works through the SPA-3000 but I am not able to answer the CW call. When I flash the line I get a second dial tone that can be used to park the current call but not answer the CW call.
Any suggestions to answer the CW call?
Thanks,
Mike
[WM: The problem is that Asterisk and the SPA-3000 use a switchhook flash for something different, and Asterisk is winning the race when you want it to be the other way around. This would be a great question to post on Voxilla. Michael Berlant is a whiz on this kind of stuff.]
Hi Ward, I was having problems reciving incoming calls on my axvoice acount after the 2.7 install. I noticed that under "Managing Incoming Calls" you have "exten => _X.,1,Goto(from-pstn-timecheck,s,1)", but I had to modify it to
exten => _.,1,Goto(from-pstn-timecheck,s,1, and now all is great.
Paul
Ward, Your instructions are so ‘memorable’, I have re-installed A@H about 4 times in the last few weeks, that I can have a basic system running in around 20 minutes, with all passwords changed, timezones adjusted (AU here) and ready to set up trunks (my memory is not that good for remembering all my usernames and passwords for my providers). Thanks heaps for these tutorials.
Re: Q27 I too have been looking for months to find an answer to this. I have posted on Voxilla, but no luck.
The problem I think,is that there is no Sip FLASH command (like Zap FLASH) to allow the actual change to dial plans.
But in ‘features.conf’, you can change the digit used for Asterisk hookflash to, say ## instead of #, and that may cause the correct operation. I have not tried it myself yet, but hopefully by the weekend I can revisit this myself.
Did anyone here try to get Asteridex to work for multiple users?
Several have written inquiring how to add secure http (https) support to Asterisk@Home. It’s easy. Log into your server as root and issue the following commands:
yum -y install mod_ssl

apachectl restart
If you have your own SSL certificate, copy it to the appropriate places on your server and edit the ssl.conf file: nano -w /etc/httpd/conf.d/ssl.conf. Otherwise, a random certificate will be added as part of the mod_ssl install.
Now you can access your Asterisk server securely at https://ipaddress_of_your_server/. For more tips, read this thread on SourceForge.
Update to comment #24 above: I have updated the script linked above to install all the stuff from the maintenance tab as modules in FreePBX. They are all in the "maintenance" category if you go loooking for them in the module admin. When you enable the modules, they show up in the tools section. The only part I haven’t "modulized" is "cisco config" if there is a great demand, I may add it. Also if anyone wants to continue using the old script (actually get a maintenance section) you can get my old script HERE. You can contact me by email if you wish @ klkunzler ([at]) gmail.com
Please see comment #24 above for additional info (the instructions in #24 haven’t changed unless you want the old script.
is it possiable to include a function in asteridex so you can print out a formated phone list with speed,name,number
thanks great work
I’m not a expert in Linux but was able to get everything up and running and was able to make a successful call from my vmware Asterisk box. After I was satisfy with an hour’s work, I rebooted the my vmware then try to ping my router again as before, to my surprise, it stopped pinging.
I checked the adaptor interface, the settings are correct.
Does anyone know where the problem is?
Tried setting the ethernet adaptor to NAT, Bridge, and host.
Installing fresh AAH2.7 with TE210P installed. Had to change boot per item 15 even though I downloaded a new spinlock.h. I change default boot as mentioned in 15, then ZAPTEL Framework comes up. However, I Still get an error, "missing /DEV/DSP". I don’t know if this is important.
Hi all,
I’ve Ast@Home 2.7 installed with TE110P, working fine. But i still with one doubt, couldn’t i get in "future" problems because i’m running Ztdummy and Digium Card.
I should comment Ztdummy on Asterisk no ?
I think this is an important question that could help many users.
BTW wouldn’t it be an improvement if Asterisk@home by the moment of Setup installation, if detects a Digium Card wouldn’t load the Ztdummy?
May be by the Setup time ASt@home is not able to recognize the Digium card in the slot?
Ps. Am I able to use Loadzone=es for Portugal? I don’t find Portugal on Indications.conf
[WM: I’m not much help on zaptel stuff. You probably oughta post this question on Voxilla.]
I have added ZAP for handling outgoing/incoming local calls. It is actually another VOIP service provider. What I did was from the provider’s ATA Box, I took the phone line to the FX Card (Instead of connecting an analog phone). Now the problem is when incoming calls are not answered and person who is calling me hangsup, zap does not hangup the call immediately. So it ends up recording that loud annoying tones. How can I fix it and what is wrong?
Hello. Long time reader, 2nd time poster. I absolutely love your guides. They have saved me a lot of headaches in dealing with AAH. However, the new samba feature in 2.7 caused me a very signifigant headache. It did not require a username or password to access the shares. Being in the DMZ is like its name would imply. I was infiltrated by an organization setting up a phishing scam. I was contacted by my ISP, who was contacted by ebay, who informed me the issue had been handed over to the F.B.I. Now I don’t think anything will come of it, because it’s obvious that I personally did not set it up.
But is there any way to secure this? I do need port 80 to administrate AAH remotely, however I would prefer not to be used for some phishing scam lol.
Thanks.
Again, awesome articles guys!
[WM: Samba with no password requirement is news to me. My default installation requires the root password. We never recommend putting an Asterisk server in the DMZ. You can accomplish the same thing by opening some ports on your firewall. Unless you’ve changed something on your default system, port 80 shouldn’t provide networking access to your system so far as I know. If someone knows otherwise, please post the steps and we’ll have a look.]
Thanks for the zaptel bug fix 🙂 Fantastic site.
Great articles! You guy are so knowledgable about Asterisk that you must not do this for a reason, but…
Wouldn’t it be easier to number lines after "1″ in your extensions with "n", rather than real numbers? Then no renumbering is required when you add/delete lines.
Example:
[custom-recordme]
exten => 5678,1,Wait(2)
exten => 5678,n,Record(/tmp/asterisk-recording:gsm)
exten => 5678,n,Wait(2)
exten => 5678,n,Playback(/tmp/asterisk-recording)
exten => 5678,n,Wait(2)
exten => 5678,6,Hangup
Regardless, thanks for the articles, they’re great!
[WM: Several have written about this. And, yes, there is a reason. We’re used to the old way. Only kidding. The new way works fine in version 2 of AAH but not at all in version 1 so we try to make most articles generic enough for all. It also forces you to use labels or mix-and-match (as you did above) to jump around in contexts so we think the numbers are more straight-forward. Finally, the numbers make it easy (at least for us) to spot a problem or a change so we’ll probably stick with them a while longer so just bear with us on this one.]
Hi,
I found that, i think is macro-dial , not sure:
I call from Zapchannel then directory and choose a SIP extension to call.
I got the person @ extension XXX is on the phone —> vmail.
In fact this extensions was unregistred…
It shouldn’t give voicemail message unavailable instead of voicemail message for busy status? I hope you can help me to fix this…
Best regards,
Marco Mouta
Hi,
A comment, then a question. In the ‘activating email delivery’ section above, the vm_email.inc file on my system didn’t correspond with the description. This is probably because I update to freepbx (I’m guessing here), but good to note.
Question – I have followed the notes, but get a ‘message deferred – host name look up failure’ on sendmail (looking in the mail queue section of webmin). Any pointers where to look for an answer ?
Thanks
Pete
Hi all,
I’m using Ast@home 2.7 and following your tutorial for redundancy and backup, all the backup went ok but i get this error for /sys/ directory:
rsync: send_files failed to open "/sys/bus/pci/drivers/parport_pc/new_id": Permission denied (13)
Is this vital for future recover? I mean, i will always have to reinstall asterisk, could i make –exclude"/sys/" on rsync ?
[WM: I don’t think it’s vital. It would get replaced in a reinstall so you can either ignore the error or add the exclude as you suggested. Thanks.]
One more question,
Your backup.sh will copy only the changes to the remote server is that right?
[WM: Correct.]
I figured out a problem I’ve been having receiving faxes — following the directions here (including the linked SPA-3000 setup) has the SPA-3000 deliver incoming PSTN calls directly to extension 99, which seems to bypass the in_pstn context. The net effect is that faxes were not detected. I added the nvfaxdetect(4) in the exten=>99 context, then had to add exten=>fax to get to the fax receive code.
So in my extensions_custom.conf I have:
[from-internal-custom]
exten => fax,1,Goto(ext-fax,in_fax,1)
;next extension (99) is to handle incoming PSTN calls
exten => 99,1,GotoIf($["${CALLERIDNUM:0:2}" = "00″]?2:3)
exten => 99,2,SetCIDNum(${CALLERIDNUM:2})
exten => 99,3,SetMusicOnHold(default)
exten => 99,4,Answer
exten => 99,5,Wait(1)
exten => 99,6,Background(welcome)
exten => 99,7,DigitTimeout,2
exten => 99,8,ResponseTimeout,2
exten => 1,1,VoiceMail(203@default)
exten => 1,2,Hangup
exten => 2,1,VoiceMail(201@default)
exten => 2,2,Hangup
exten => t,1,Answer
exten => t,2,Wait(1)
exten => t,3,Background(custom/tom-sherry-kids)
exten => t,4,NVFaxDetect(4) ; detect faxes while playing ring sound – goes to "fax" extension if detected
exten => t,5,Dial(SIP/200&SIP/201,20,m)
exten => t,6,VoiceMail(201@default)
exten => t,7,Hangup
exten => i,1,Answer
exten => i,2,Wait(1)
exten => i,3,Playback(wrong-try-again-smarty)
exten => i,4,Goto(99,5)
Perhaps the SPA-3000 configs here are out of date, but I couldn’t get the built-in fax working following the NerdVittles instructions verbatim. Now to figure out why outgoing PSTN calls disconnect after a minute…
tg.
Your tutorials are great. I have everything but faxing working. I am using an SPA-3000 and followed your instructions for it and for the Stealth AutoAttendant to the letter. I think my problem is that the exten 99 code nor the AutoAttendant are running NVFaxDetect, but what do I now, I am a newbie. Would it be possible than in one of your upcoming tutorials you cover how to get the SPA-3000, the Stealth AutoAttendant, faxing, and Zapteller working in good harmony.
[WM: See #55 above.]
Step #55 fixes faxing, but Zapateller is not working. Also anonymous calls just ring through. I guess I have to add the exten 111 Zapateller and anonymous call blocking code to the exten 99 block.
Here is my exten => 99 block for the SPA-3000. I think it covers everything, Zapatell, anonymous calls, and faxing. The only thing I have not tested is faxing, but based on post 55 it should work.
exten => fax,1,Goto(ext-fax,in_fax,1)
;next extension (99) is to handle incoming PSTN calls
exten => 99,1,GotoIf($["${CALLERIDNUM:0:2}" = "00″]?2:3)
exten => 99,2,SetCIDNum(${CALLERIDNUM:2})
exten => 99,3,Zapateller(answer|nocallerid)
exten => 99,4,Wait(1)
exten => 99,5,SetMusicOnHold(default)
exten => 99,6,GotoIf($["${CALLERIDNUM}" = ""]?who-r-u,s,1)
exten => 99,7,GotoIf($["foo${CALLERIDNUM}" = "foo"]?who-r-u,s,1)
exten => 99,8,GotoIf($["${CALLERIDNAME:0:9}" = "Anonymous"]?who-r-u,s,1)
exten => 99,9,GotoIf($["${CALLERIDNAME:0:7}" = "Unknown"]?who-r-u,s,1)
exten => 99,10,GotoIf($["${CALLERIDNUM:0:7}" = "Private"]?who-r-u,s,1)
exten => 99,11,GotoIf($["${CALLERIDNAME:0:7}" = "Private"]?who-r-u,s,1)
exten => 99,12,GotoIf($["${CALLERIDNUM:0:10}" = "Restricted"]?who-r-u,s,1)
exten => 99,13,GotoIf($["${CALLERIDNAME:0:11}" = "OUT OF AREA"]?who-r-u,s,1)
exten => 99,14,GotoIf($["${CALLERIDNUM:0:4}" = "PSTN"]?who-r-u,s,1)
exten => 99,15,GotoIf($["${CALLERIDNAME:0:4}" = "PSTN"]?who-r-u,s,1)
exten => 99,16,DigitTimeout,3
exten => 99,17,ResponseTimeout,3
exten => 99,18,Background(custom/welcome)
exten => 0,1,Background(pls-hold-while-try)
exten => 0,2,Dial(local/200@from-internal,20,m)
exten => 0,3,VoiceMail(200@default)
exten => 0,4,Hangup
exten => 1,1,Background(pls-hold-while-try)
exten => 1,2,Dial(local/204@from-internal,20,m)
exten => 1,3,VoiceMail(204@default)
exten => 1,4,Hangup
exten => 4,1,Authenticate(123456)
exten => 4,2,Background(pls-wait-connect-call)
exten => 4,3,DISA(no-password|from-internal)
exten => 2XX,1,Background(pls-hold-while-try)
exten => 2XX,2,Dial(local/${EXTEN}@from-internal,20,m)
exten => 2XX,3,VoiceMail(${EXTEN}@default)
exten => 2XX,4,Hangup
exten => 2XX,103,Voicemail(${EXTEN}@default)
exten => 2XX,104,Hangup
exten => t,1,Background(pls-hold-while-try)
exten => t,2,NVFaxDetect(10) ; detect faxes while playing ring sound – goes to ?��Ǩ?�fax?��Ǩ�� extension if detected
exten => t,3,Dial(local/204@from-internal,20,m)
exten => t,4,VoiceMail(204@default)
exten => t,5,Hangup
exten => i,1,Playback(wrong-try-again-smarty)
exten => i,2,Goto(99,18)
I had run into problems setting up remote extensions, and instead of using: externip=name.dyndns.org I found:
externhost=name.dyndns.org
externrefresh=10
where the externrefresh specifies how often the host name should be checked to be resolved!
Thanks for the great play by play! This is awesome!
tphank
Ward
This installation article is great, I however live in Toronto, Canada and use Acanac as my provider. I used your instructions but opened an Acanac account and used the Acanac IP address(66.49.255.42) as the host and got great results. At $9.95 per month for unlimited US and Canada calls the deal is sweet.
When will the 2.8 guide be up?
[WM: There still are some major problems with the 2.8 release. It may be 2.9 before everyone gets sufficient kinks worked out to make it useful in a production environment. You can follow the threads on SourceForge to see a list of the problems.]