
The 30-Second PBX: Introducing Proxmox 4 for the Intel NUC and Asterisk 13
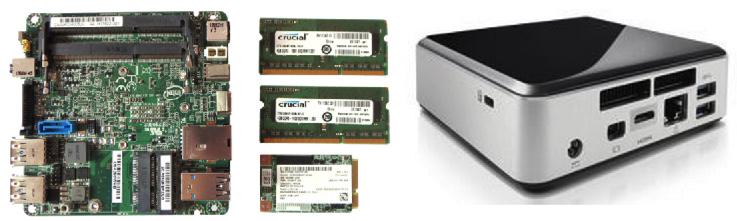
With the advent of cloud-based computing and desktop virtual machine platforms like VirtualBox, we haven’t played with dedicated hardware for Asterisk® in a couple of years. WOW! It’s just amazing the quantum leaps in miniaturization, price, and performance that have transpired during our absence. Last week, we introduced a dedicated server platform for under $200 that could serve as a small business PBX for almost any 20-30 person organization. Today, meet Big Brother. You’re looking at all the components that… Read More ›


 JUST RELEASED: Visit the Incredible PBX Wiki
