
Taming the Condo Call Box with a Raspberry Pi & Asterisk
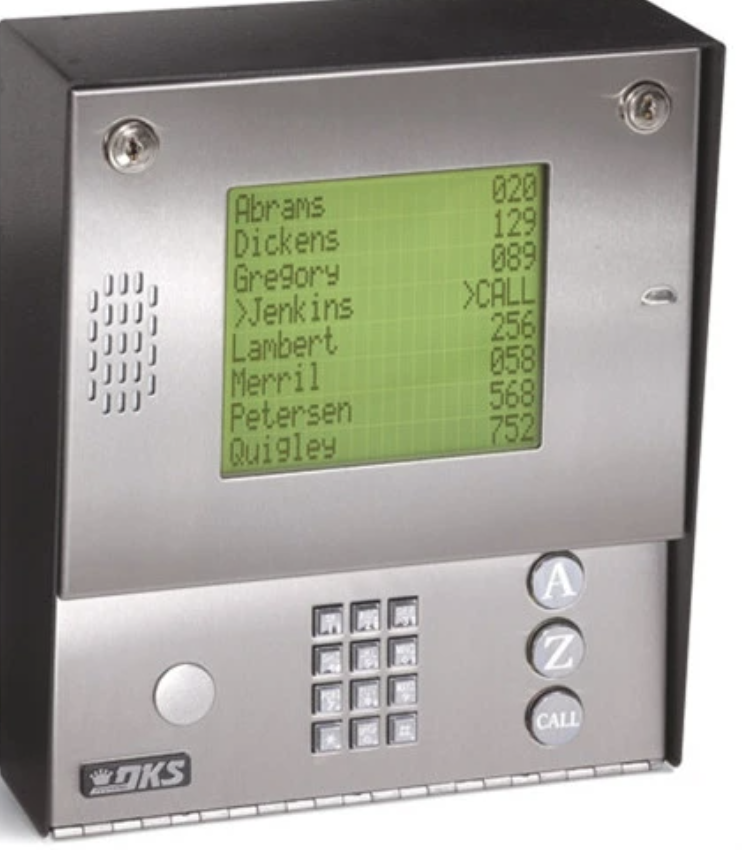
If you live in an apartment complex or condominium with a call box to let visitors gain door access by calling your apartment, then today’s column is for you. The way almost all of these call boxes work is the management company programs your name, phone number, and apartment number into the call box after which a visitor can look up your name or enter your apartment number and the call box will call you. When you answer the call… Read More ›


 JUST RELEASED: Visit the Incredible PBX Wiki
